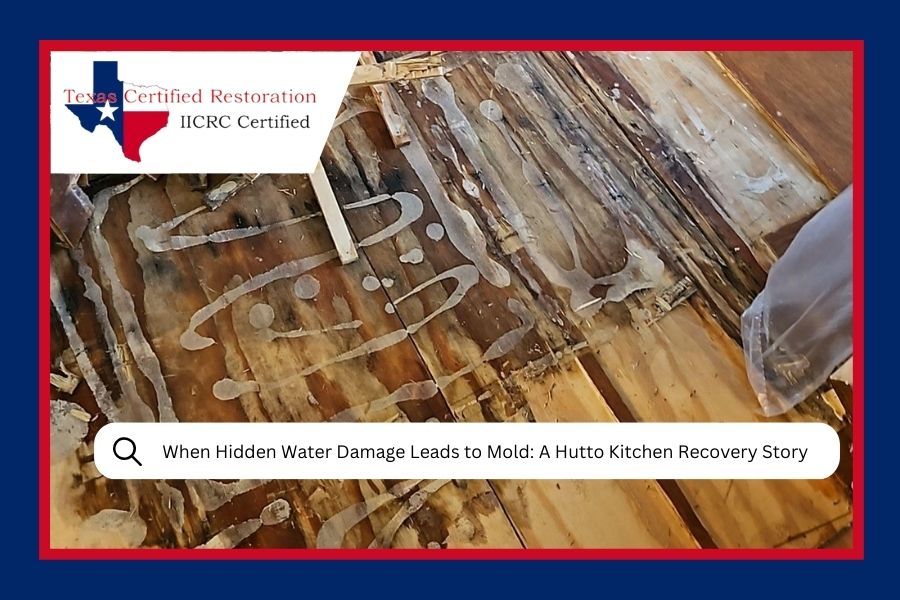
When Hidden Water Damage Leads to Mold: A Hutto Kitchen Recovery Story
Updated on: January 27, 2026
Author: Tracy King
Every homeowner's nightmare starts with a small leak they never saw coming. For one family in Hutto, what began as a minor concern turned into a full-scale water damage restoration and mold remediation project affecting their kitchen and closet. This is the story of how we helped them reclaim their home.
The Discovery: More Than Meets the Eye
The call came in on a Tuesday afternoon. The homeowner had noticed some discoloration on the kitchen wall and a musty smell they couldn't quite place. When they finally pulled back some of the materials to investigate, they found exactly what no one wants to see: active mold growth.
By the time our team at Texas Certified Restoration arrived, it was clear this wasn't a recent problem. The moisture had been there for a while, hidden behind walls and inside the closet where no one thought to look. Water damage has this sneaky way of spreading where you can't see it, and this home was a textbook example.

Assessment: Getting the Full Picture
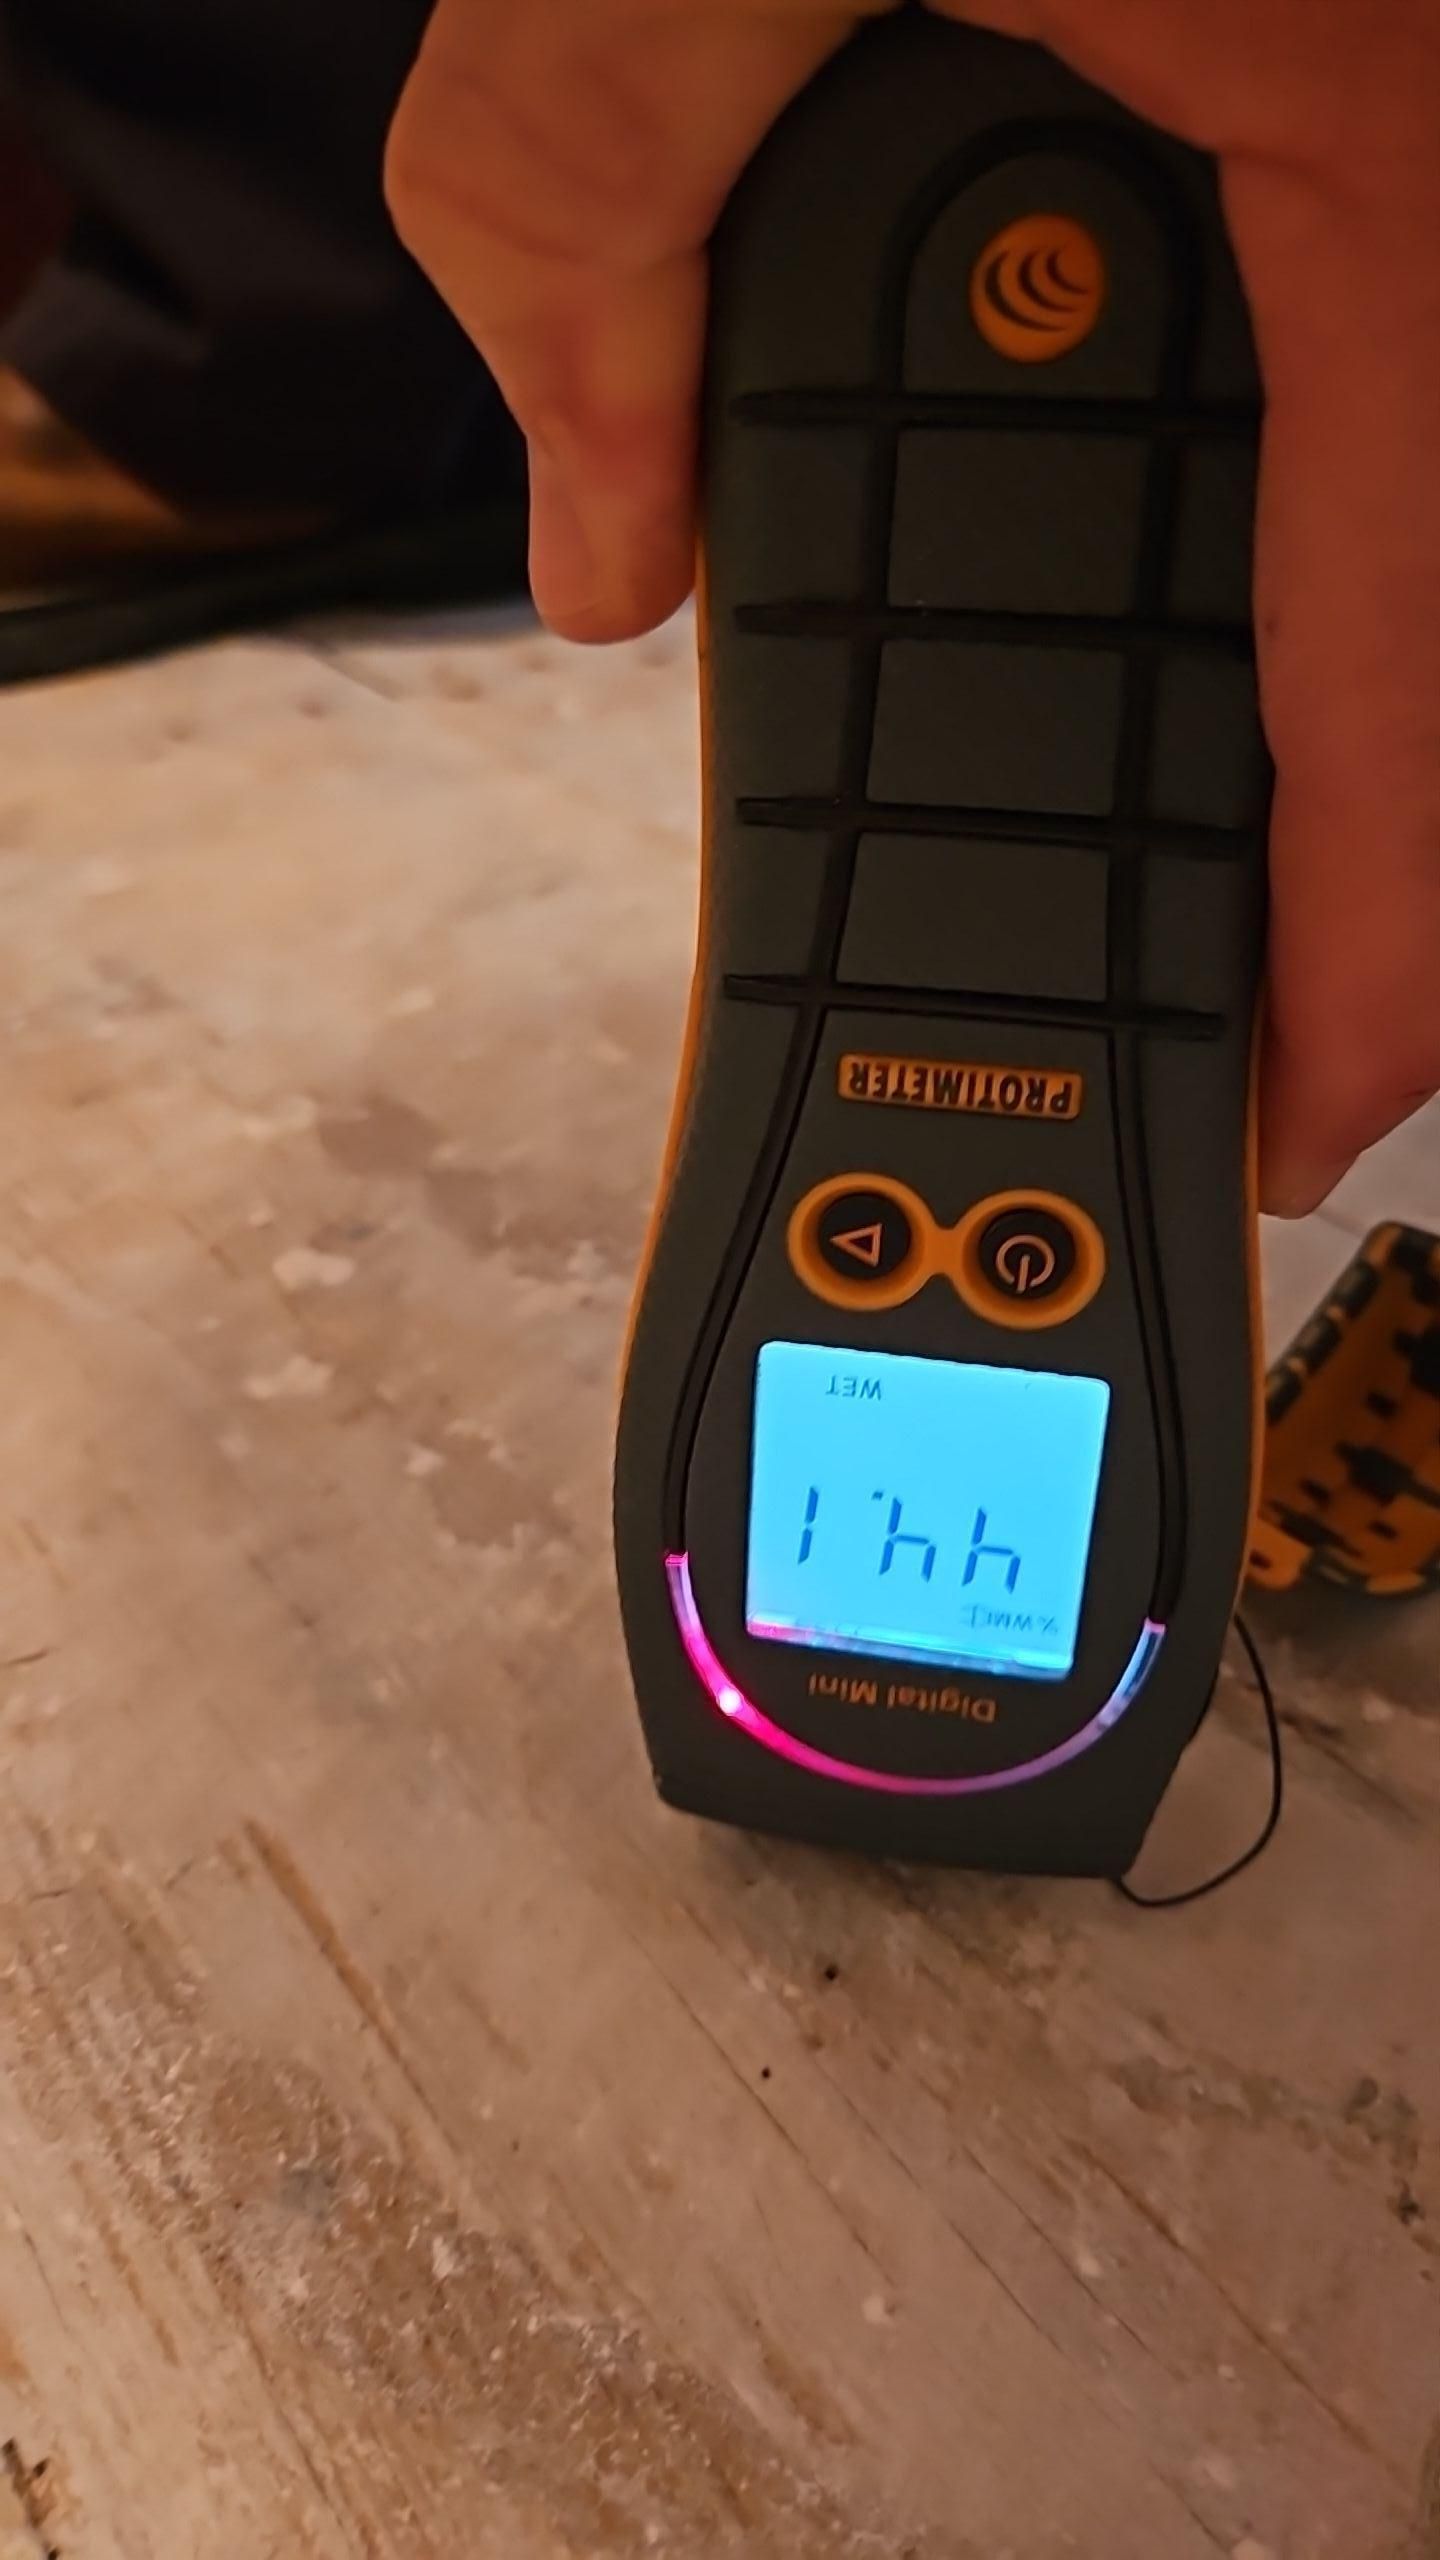
The first thing we did was conduct a thorough inspection using moisture meters. These handheld devices tell us exactly where water is hiding, even in places that look perfectly dry to the naked eye. The readings showed elevated moisture levels throughout the affected kitchen area and into the adjacent closet.
Here's what we found:
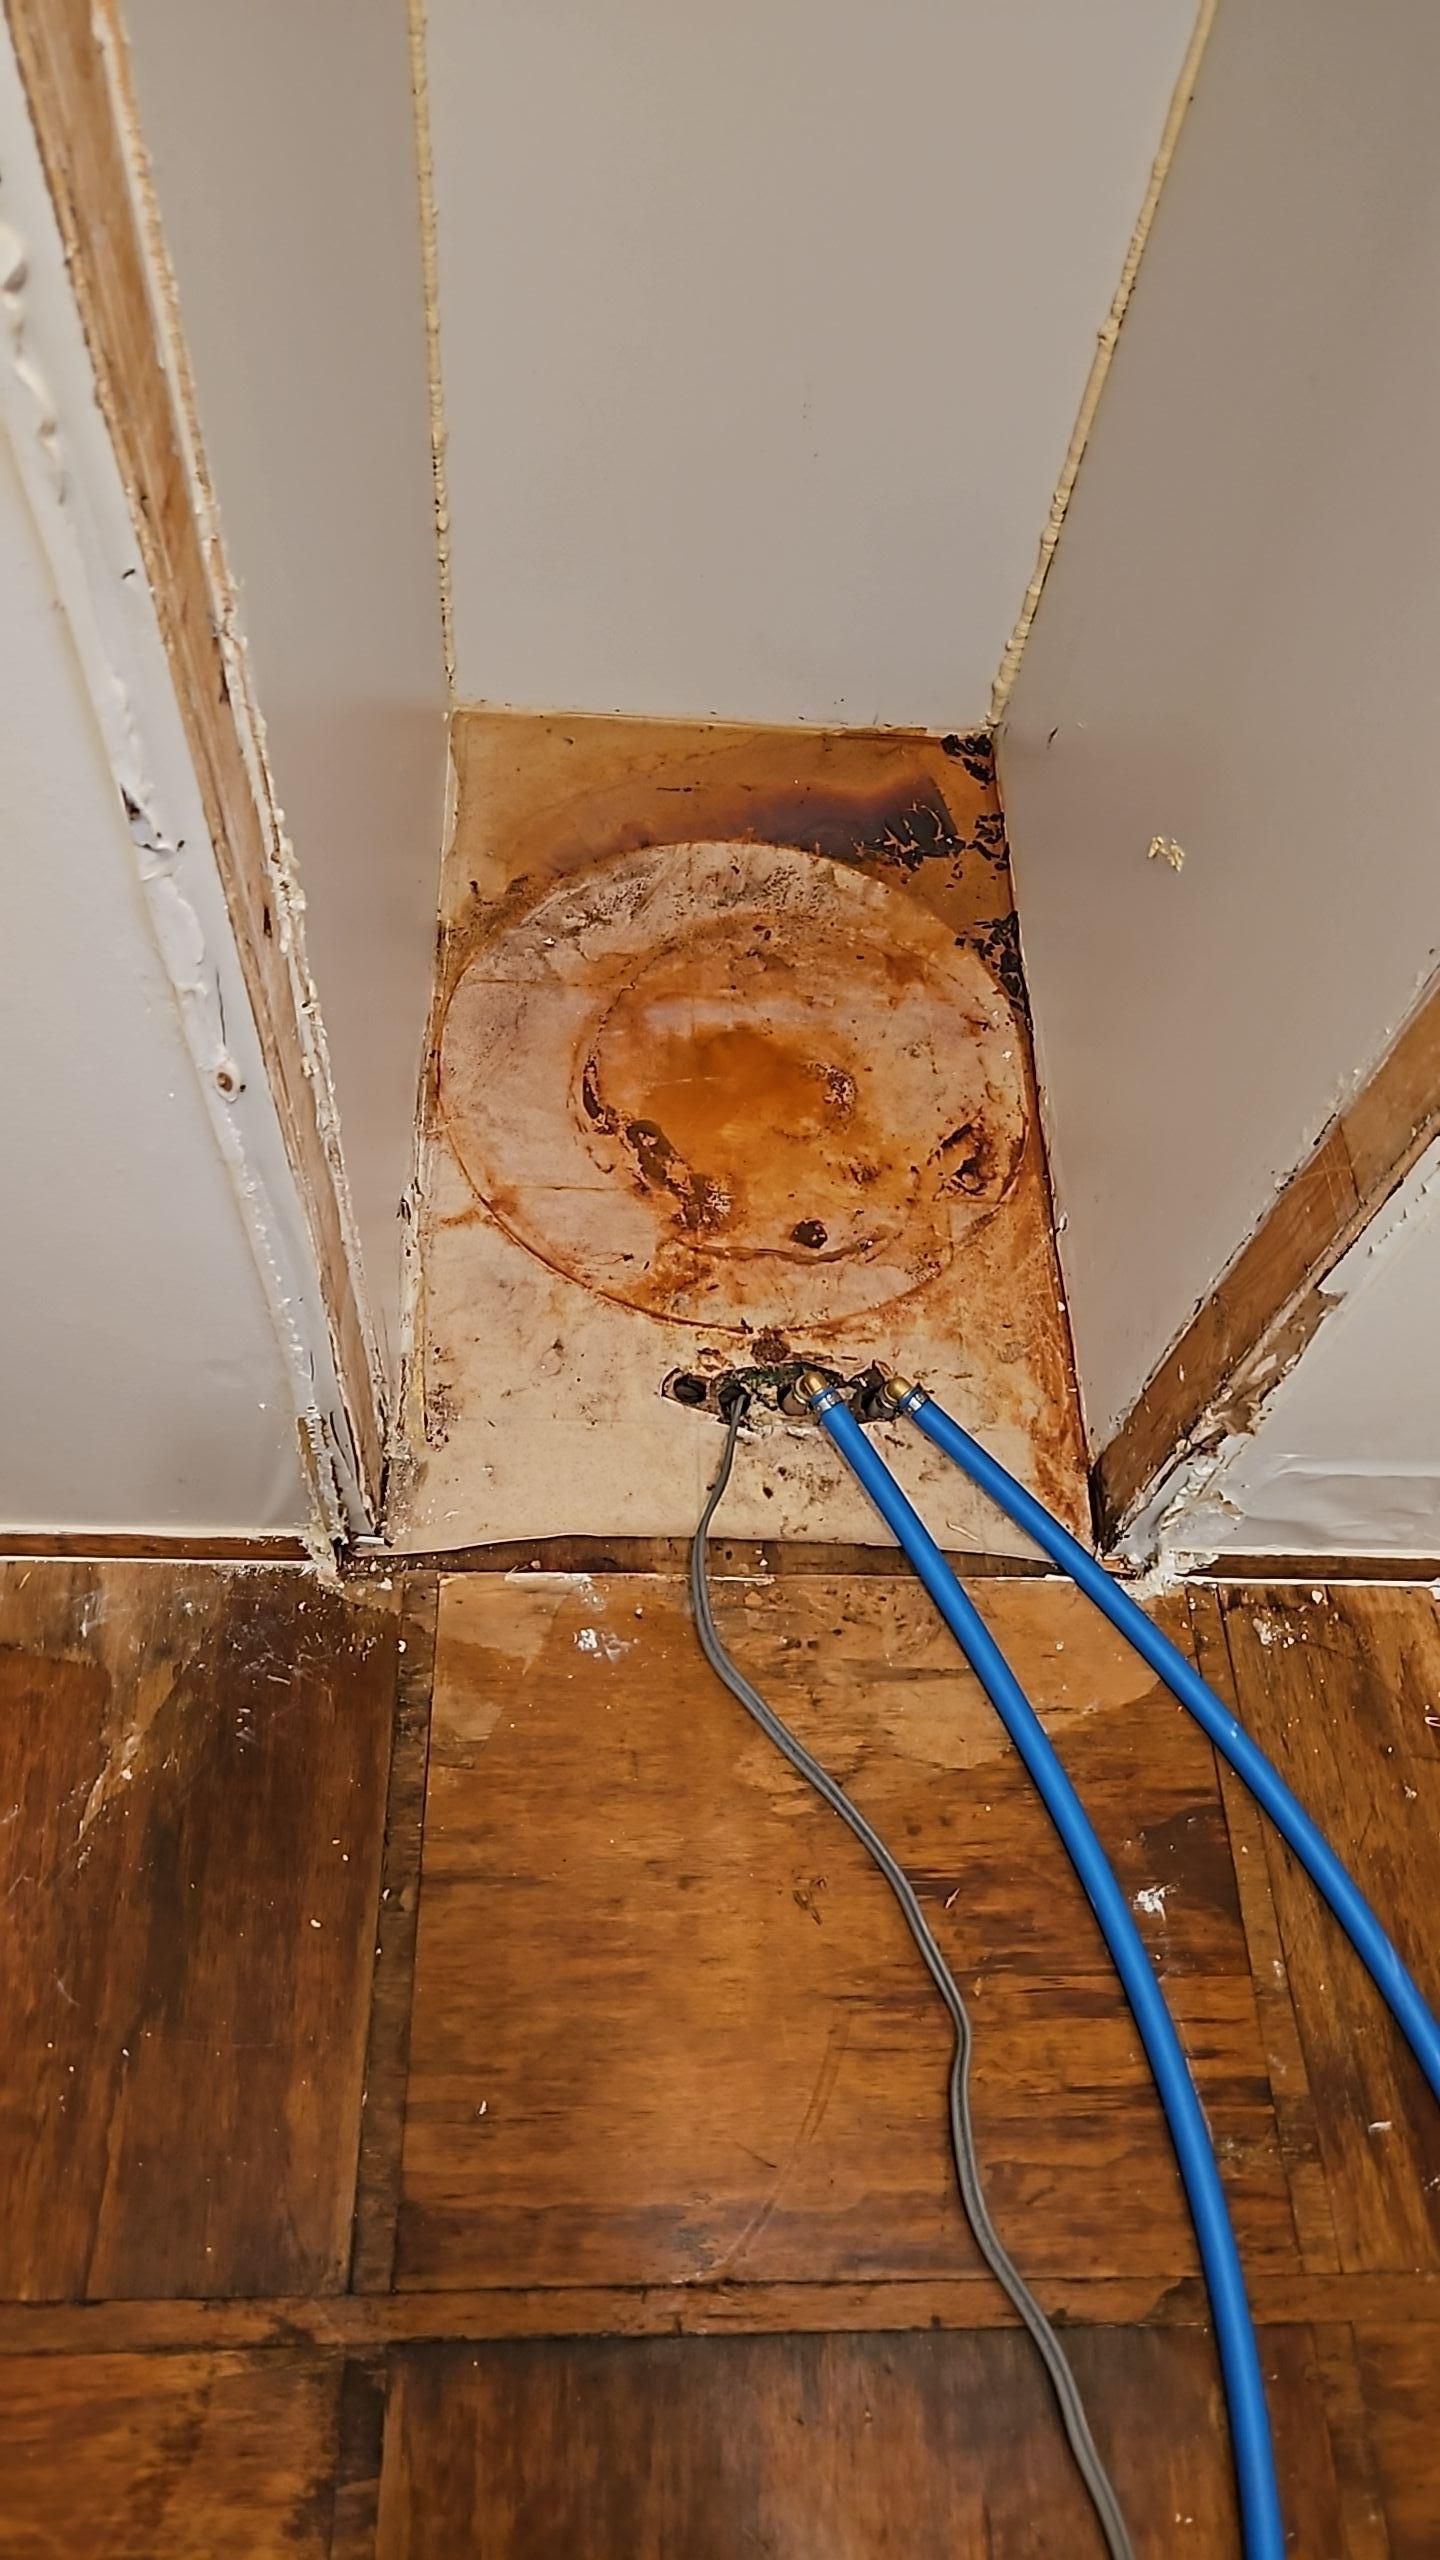
- Kitchen walls: Multiple sections showed water intrusion behind the drywall
- Closet interior: Moisture had traveled through wall cavities, affecting the closet space
- Mold growth: Active microbial growth on multiple surfaces that needed immediate treatment
We documented everything with photos and detailed notes. This kind of thorough documentation is critical for insurance claims, but it's also how we create a clear action plan. The homeowner needed to understand exactly what we were dealing with and what needed to happen next.
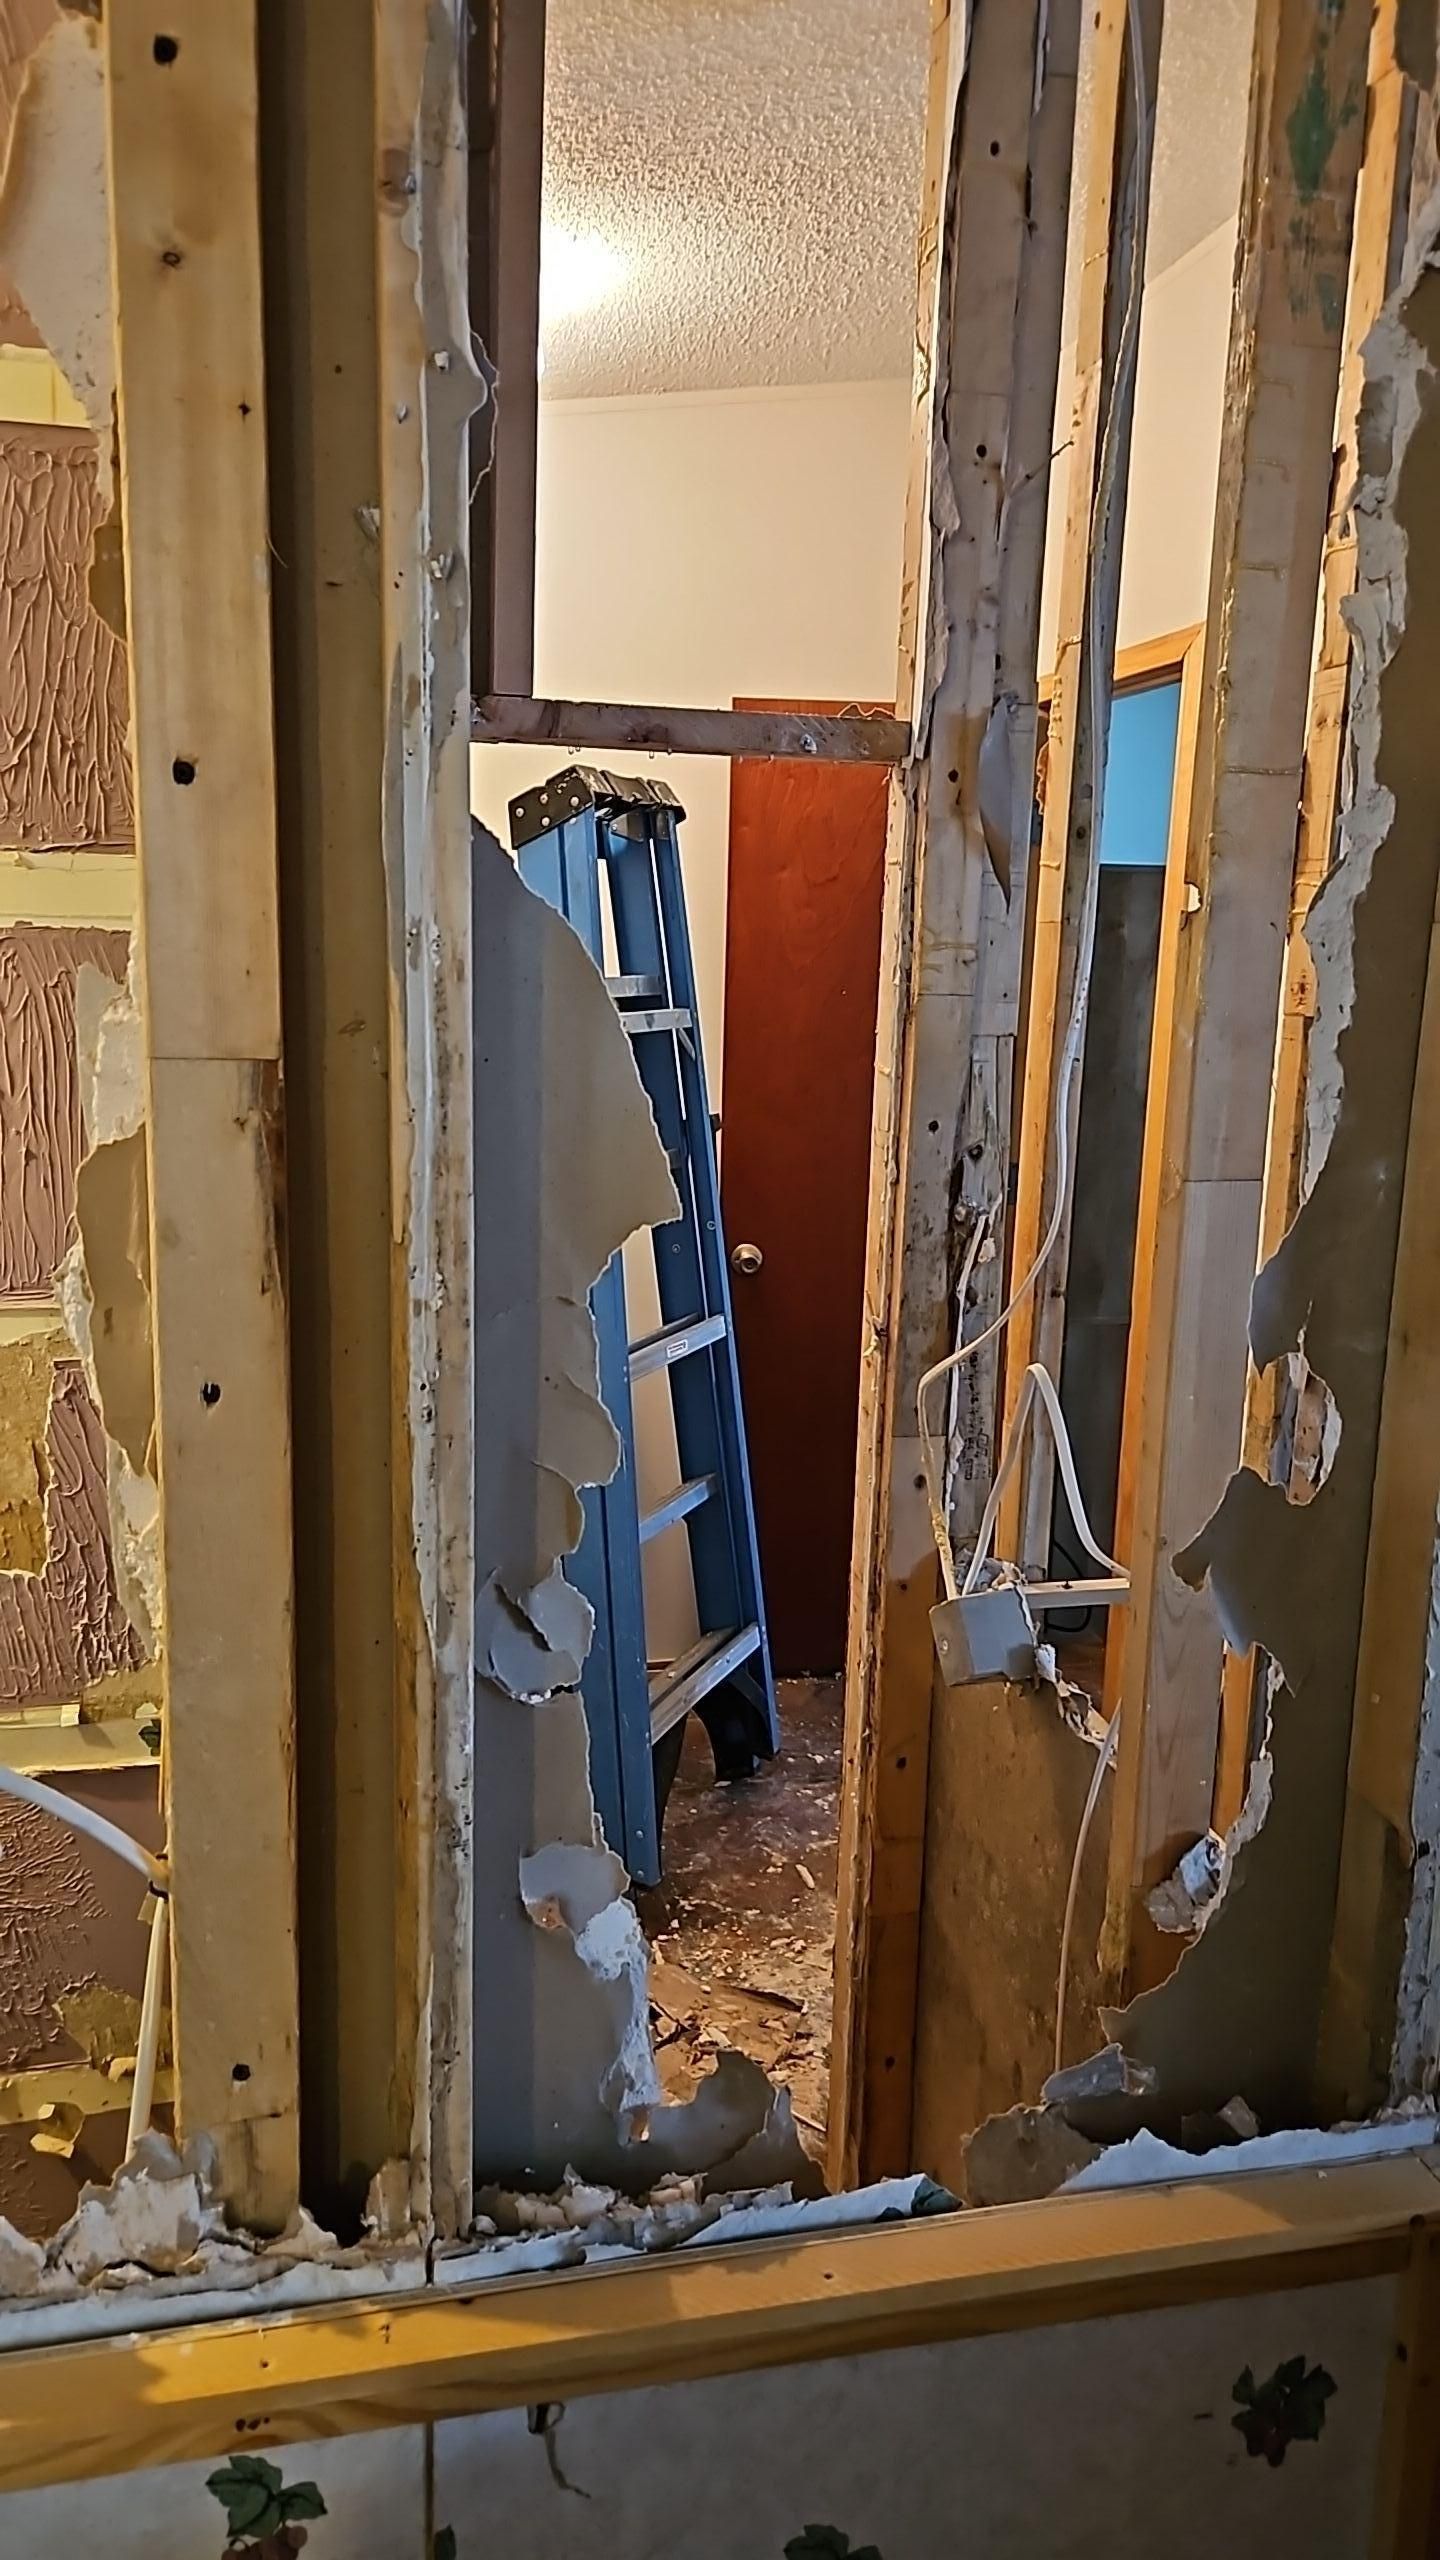
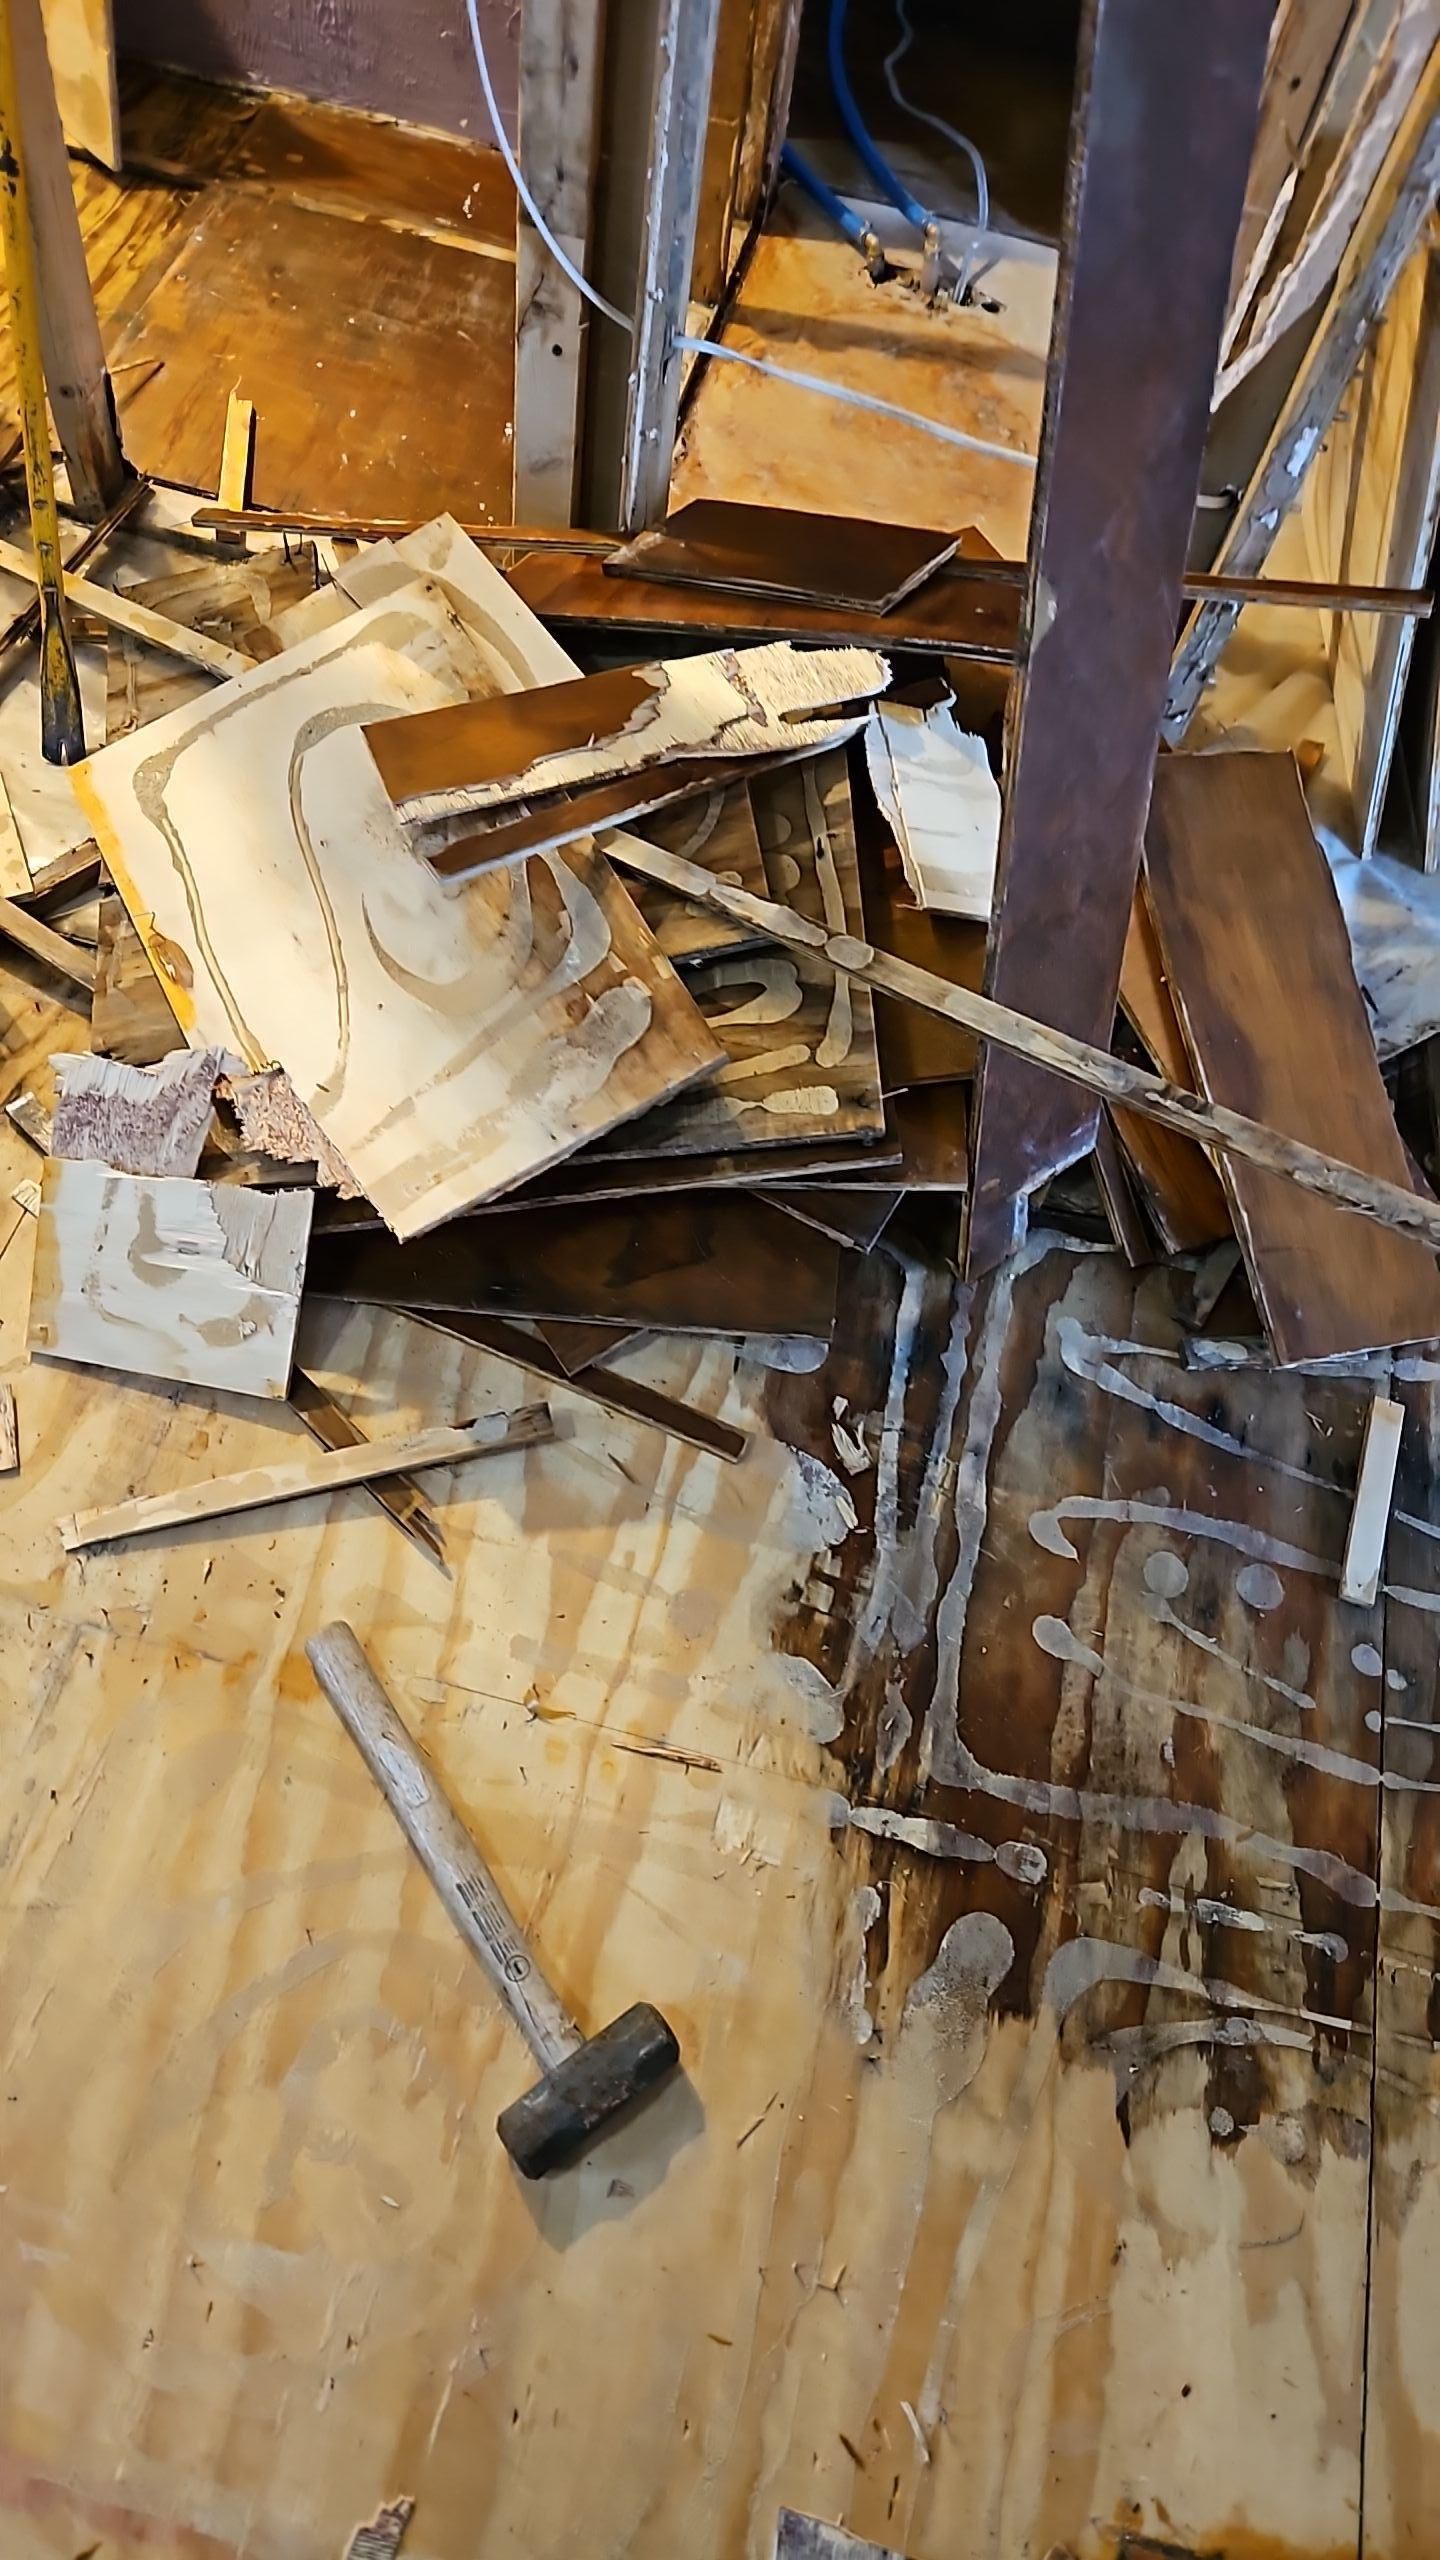
The Removal Process: Clearing Out Damaged Materials
Once we had the full scope, it was time to get to work. Dealing with water damage and mold isn't something you can do halfway. You have to remove every affected material, or the problem will just come back.
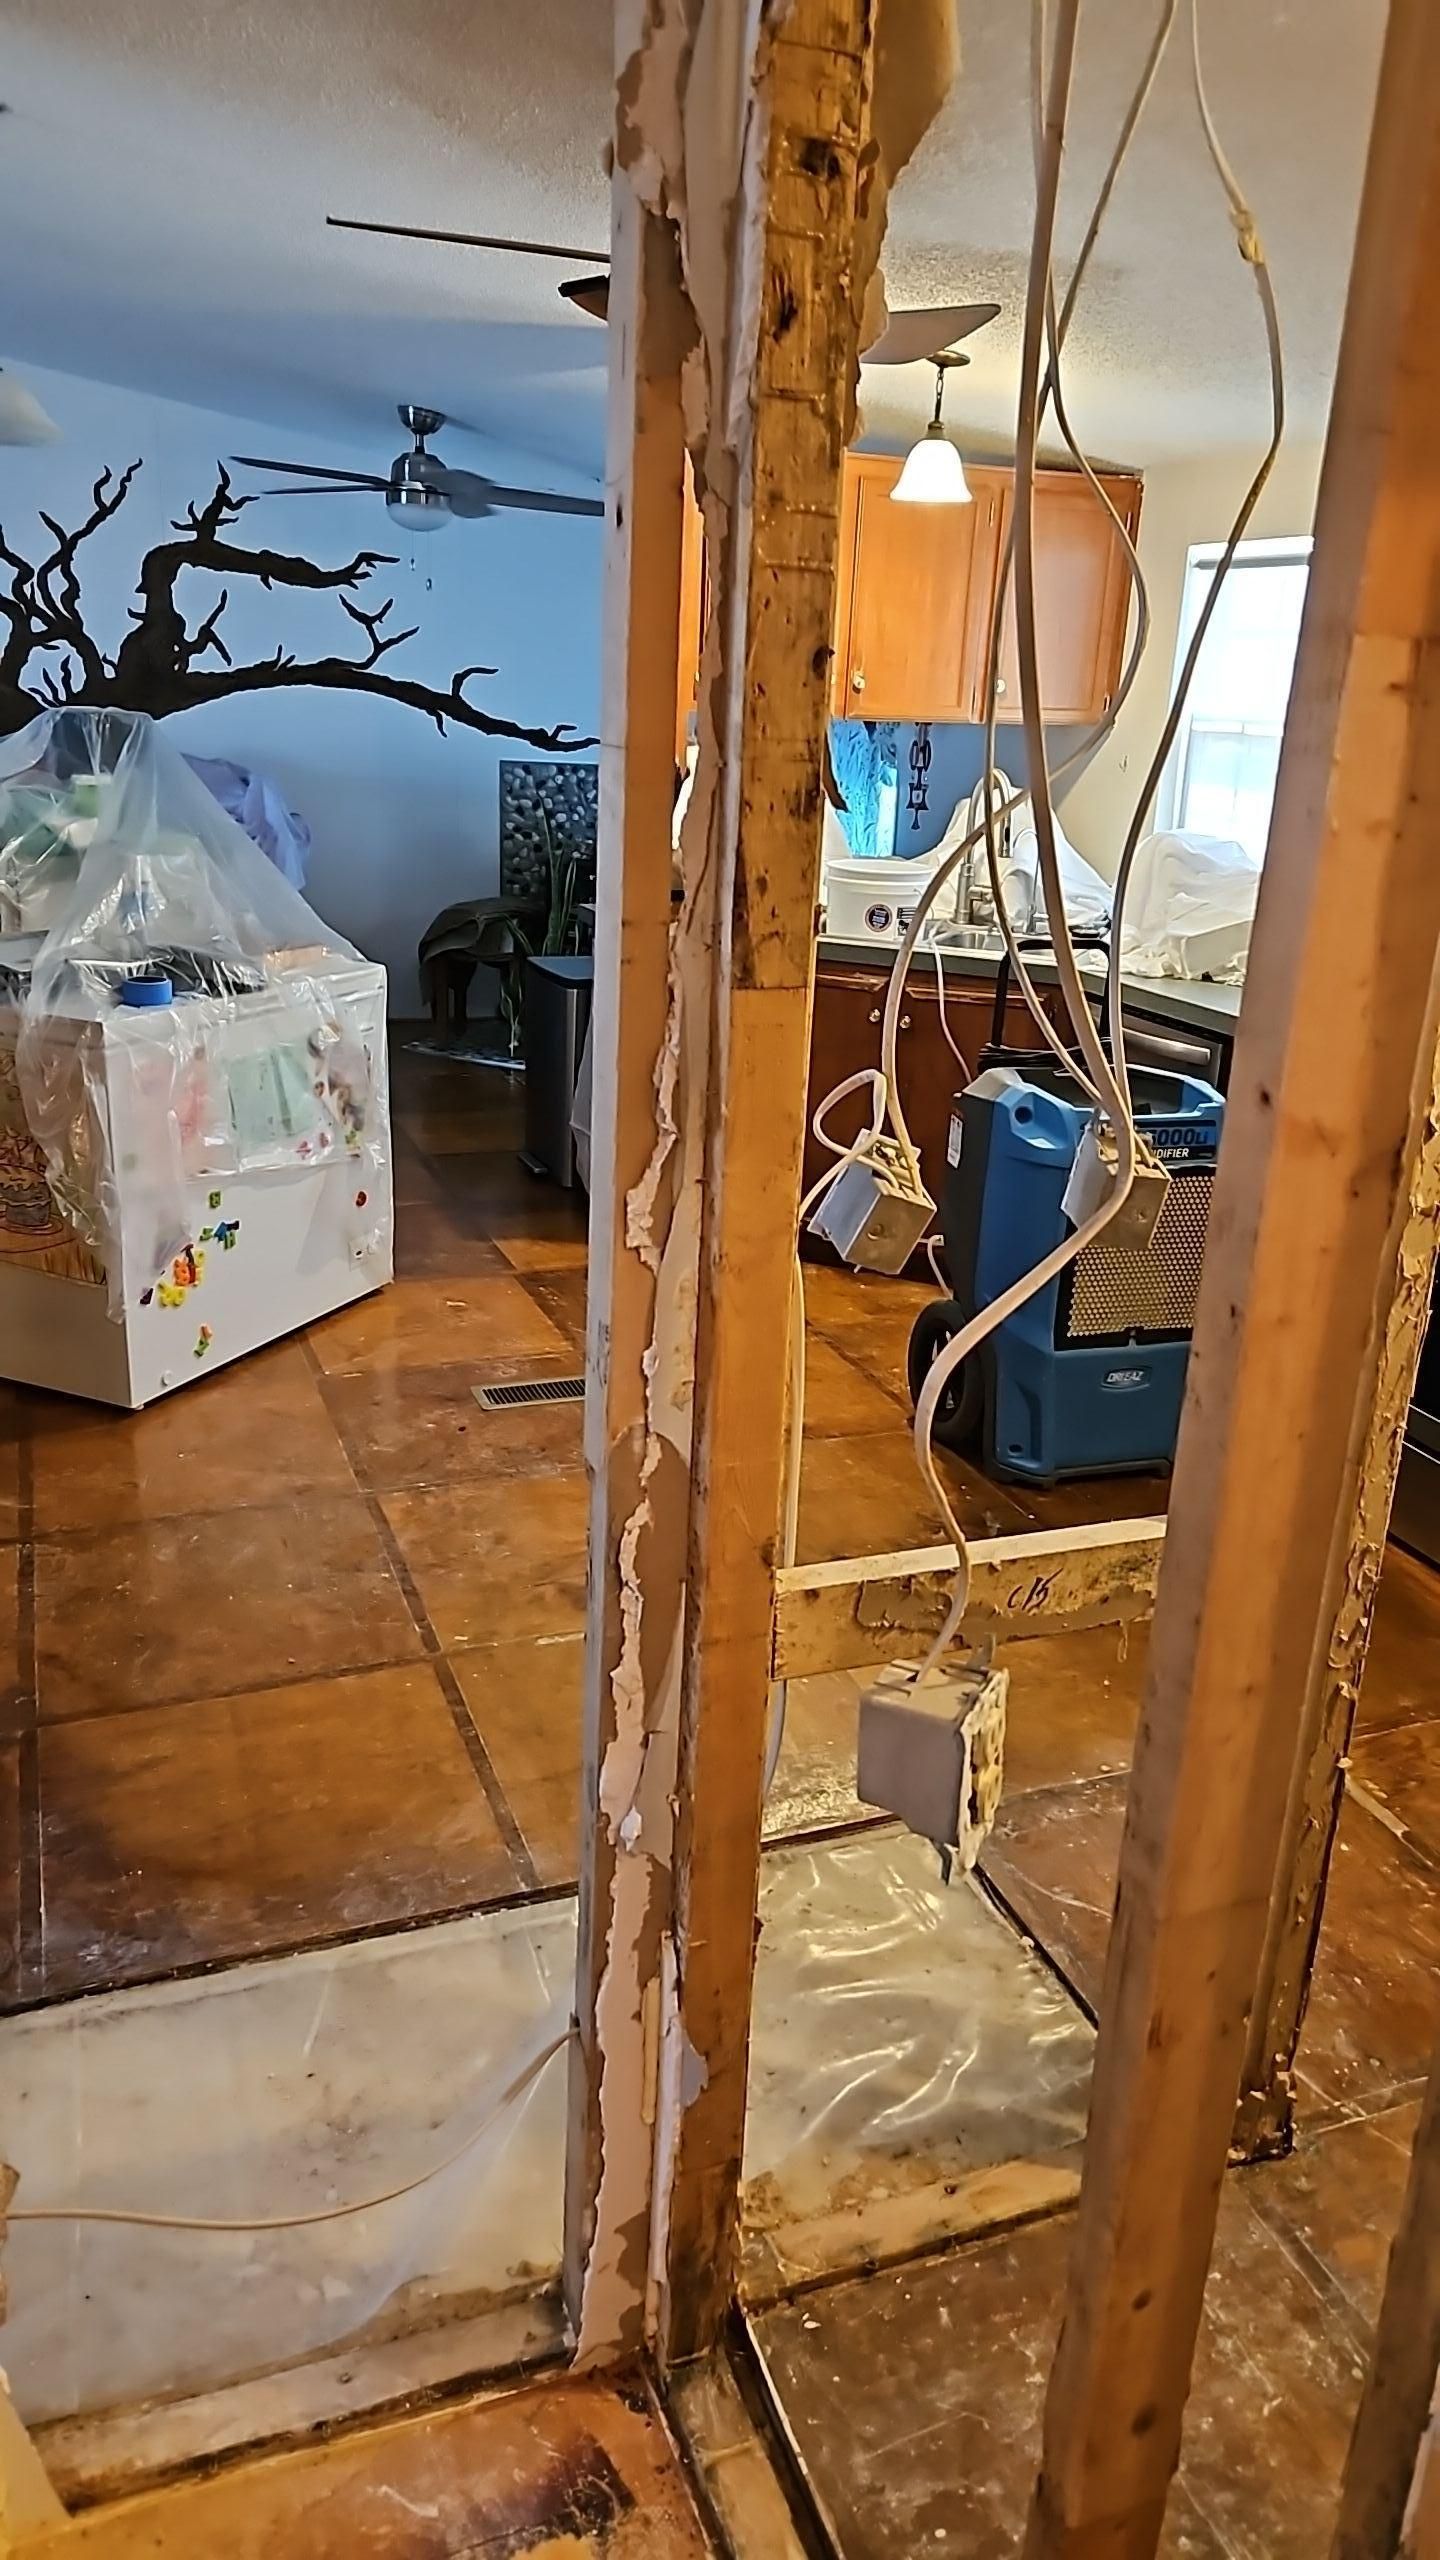
Kitchen Demolition
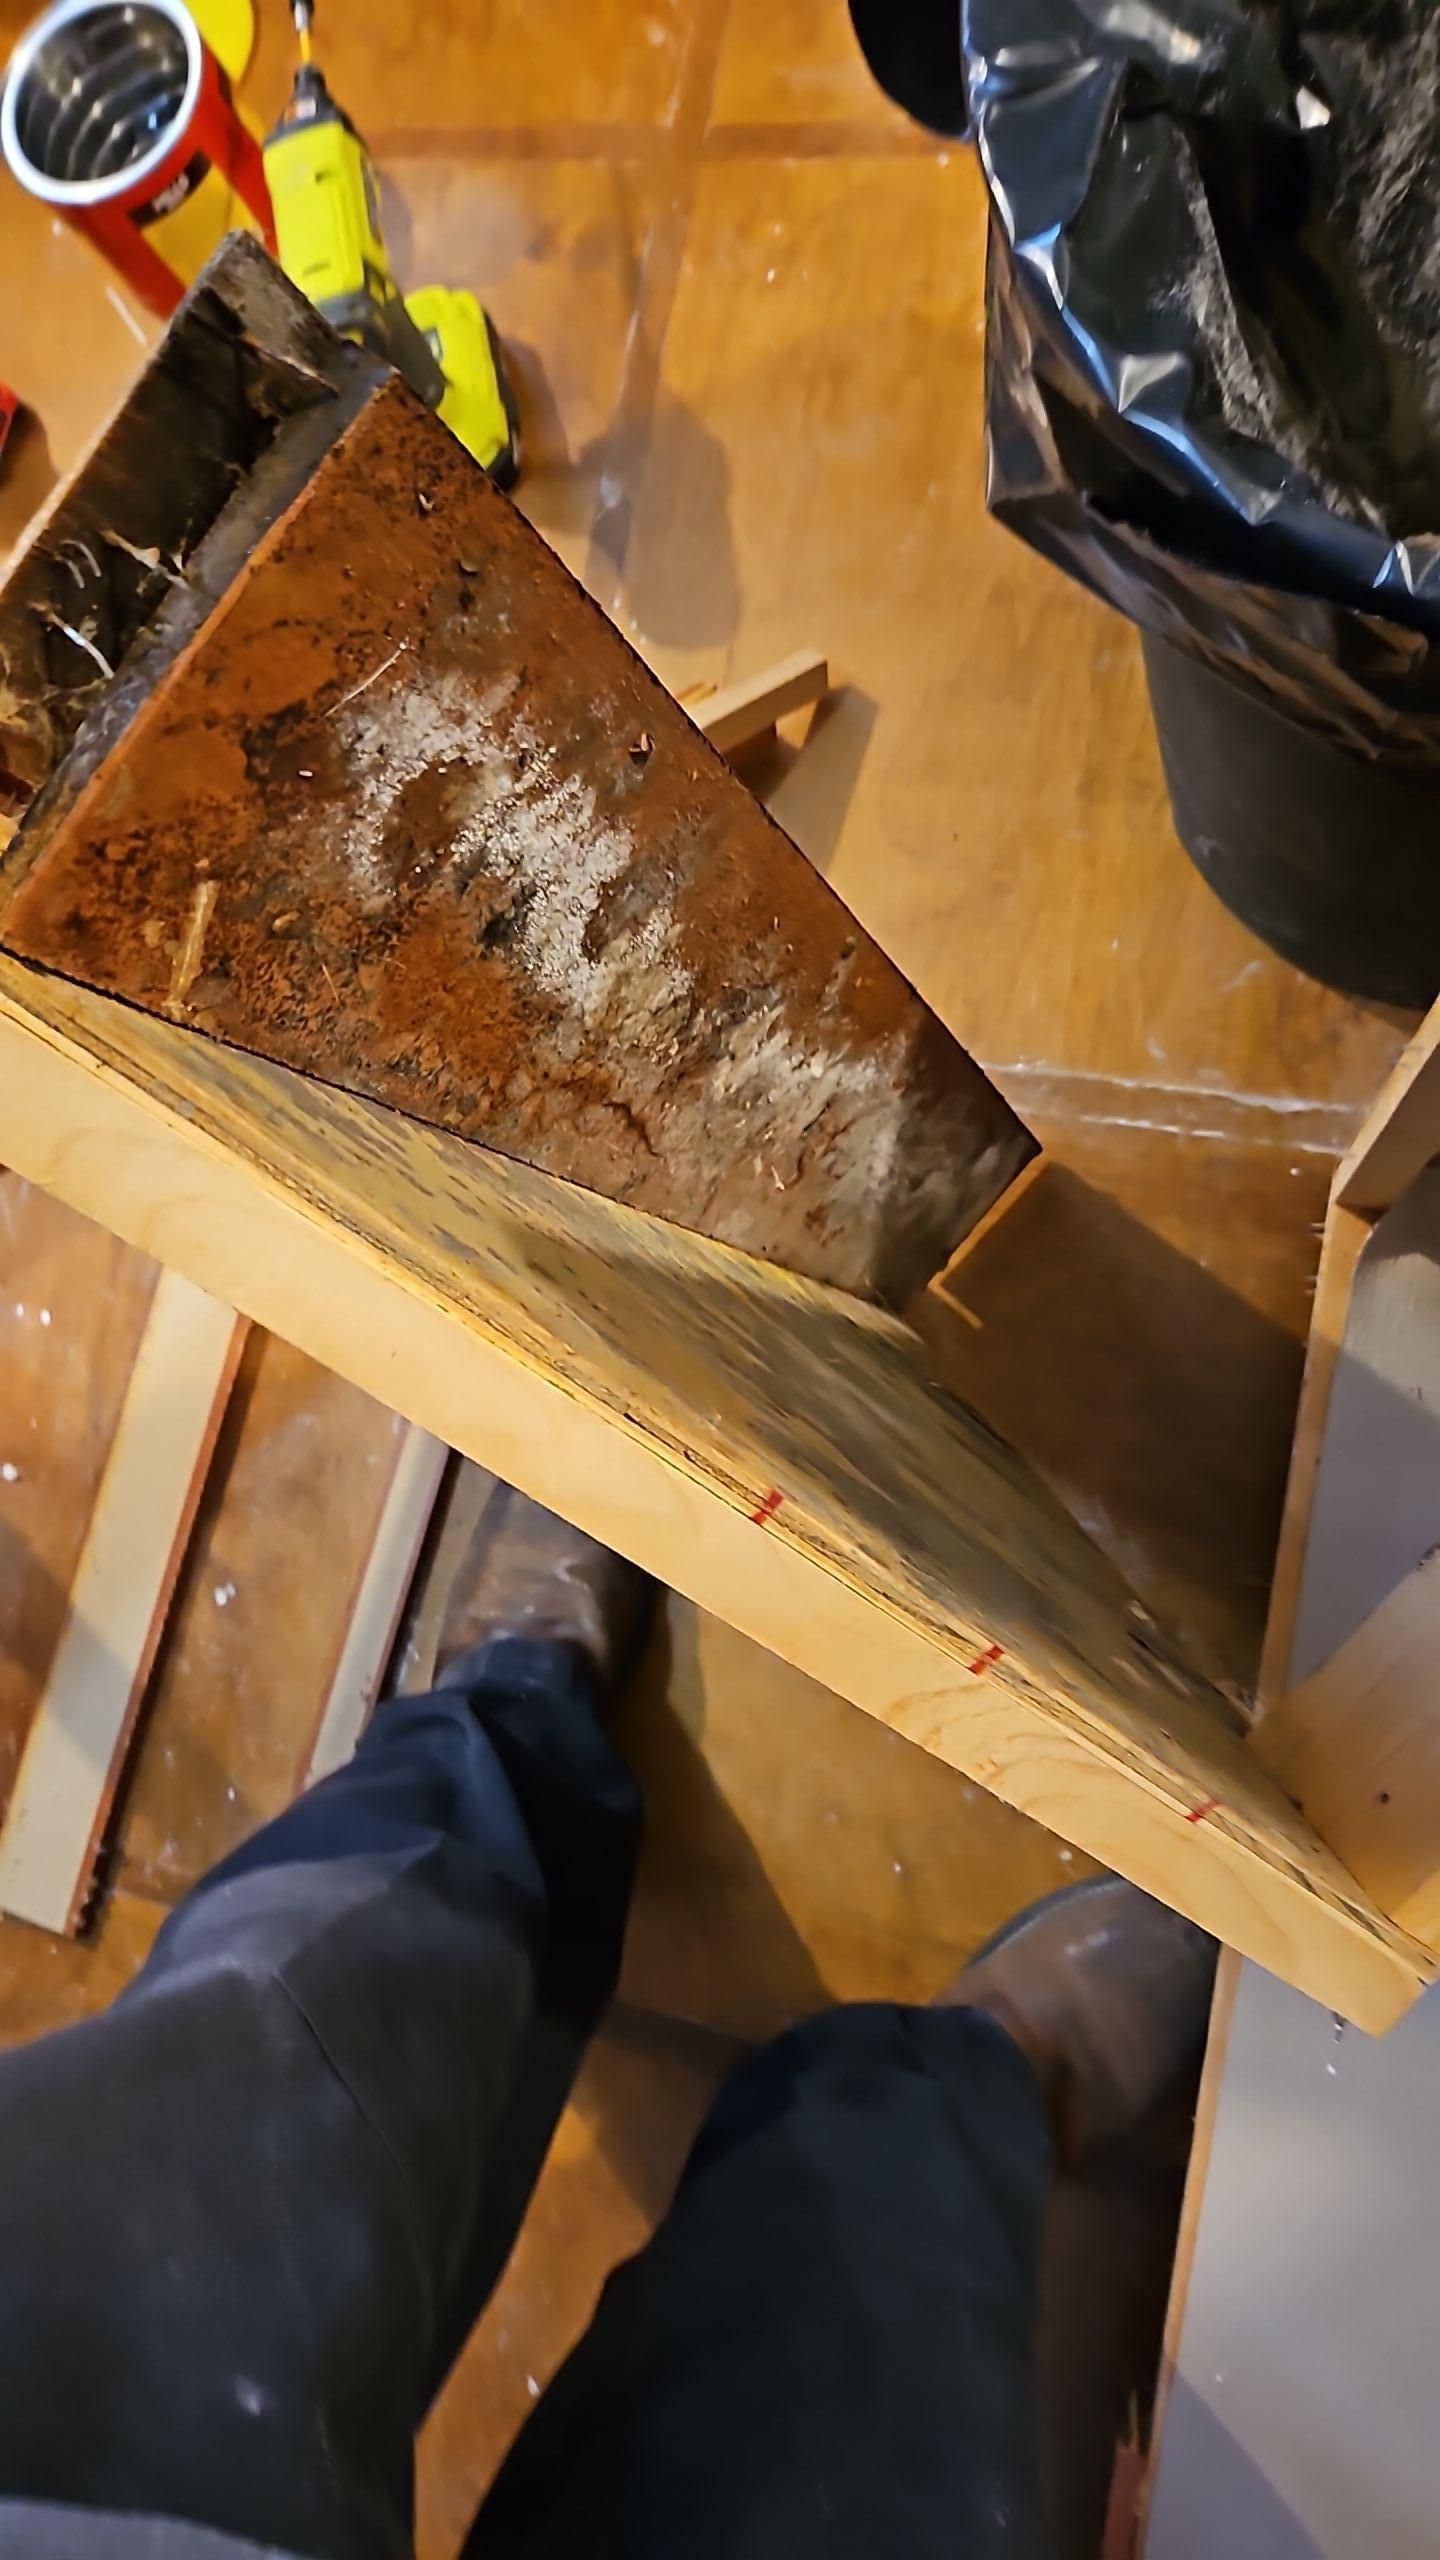
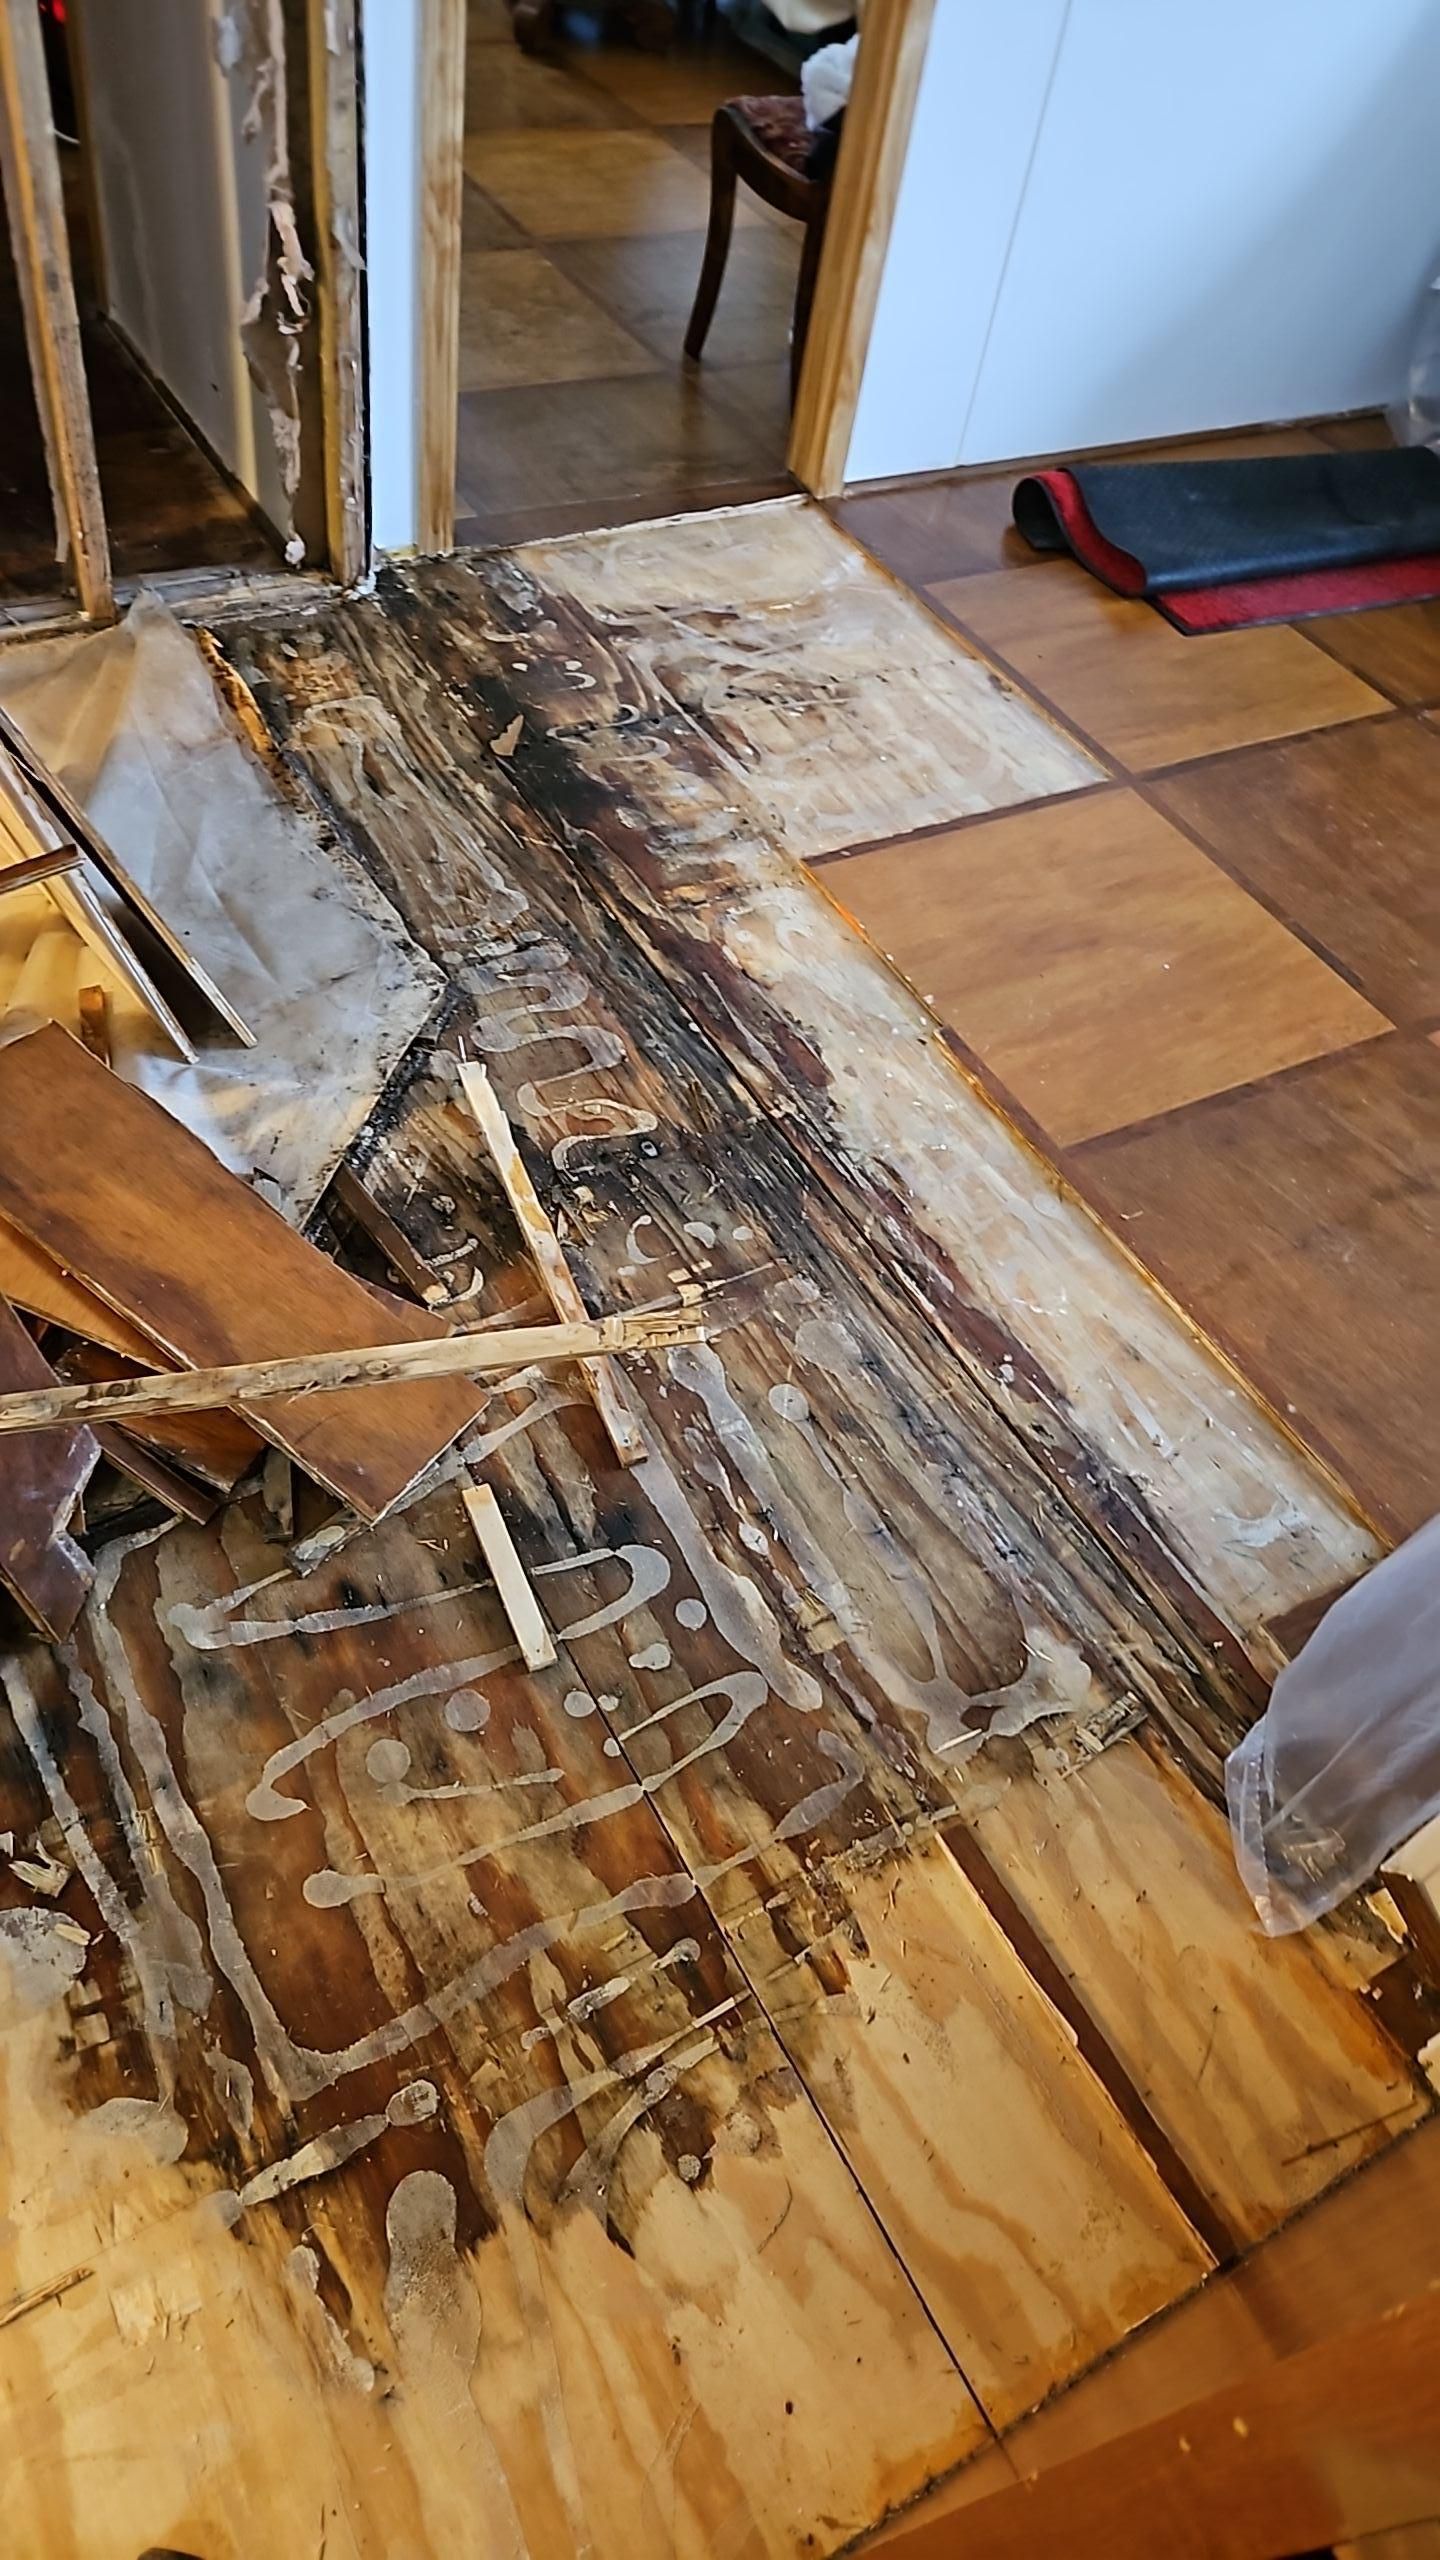
In the kitchen, we removed sections of drywall that showed water staining and mold growth. The affected areas included portions of the walls where moisture had traveled from the original leak source. When drywall gets saturated and grows mold, there's no saving it. It has to come out.
We also pulled up flooring in the affected zones. Even though the surface might look okay, moisture underneath can continue causing problems. Better to remove it now than deal with warped floors or more mold down the road.
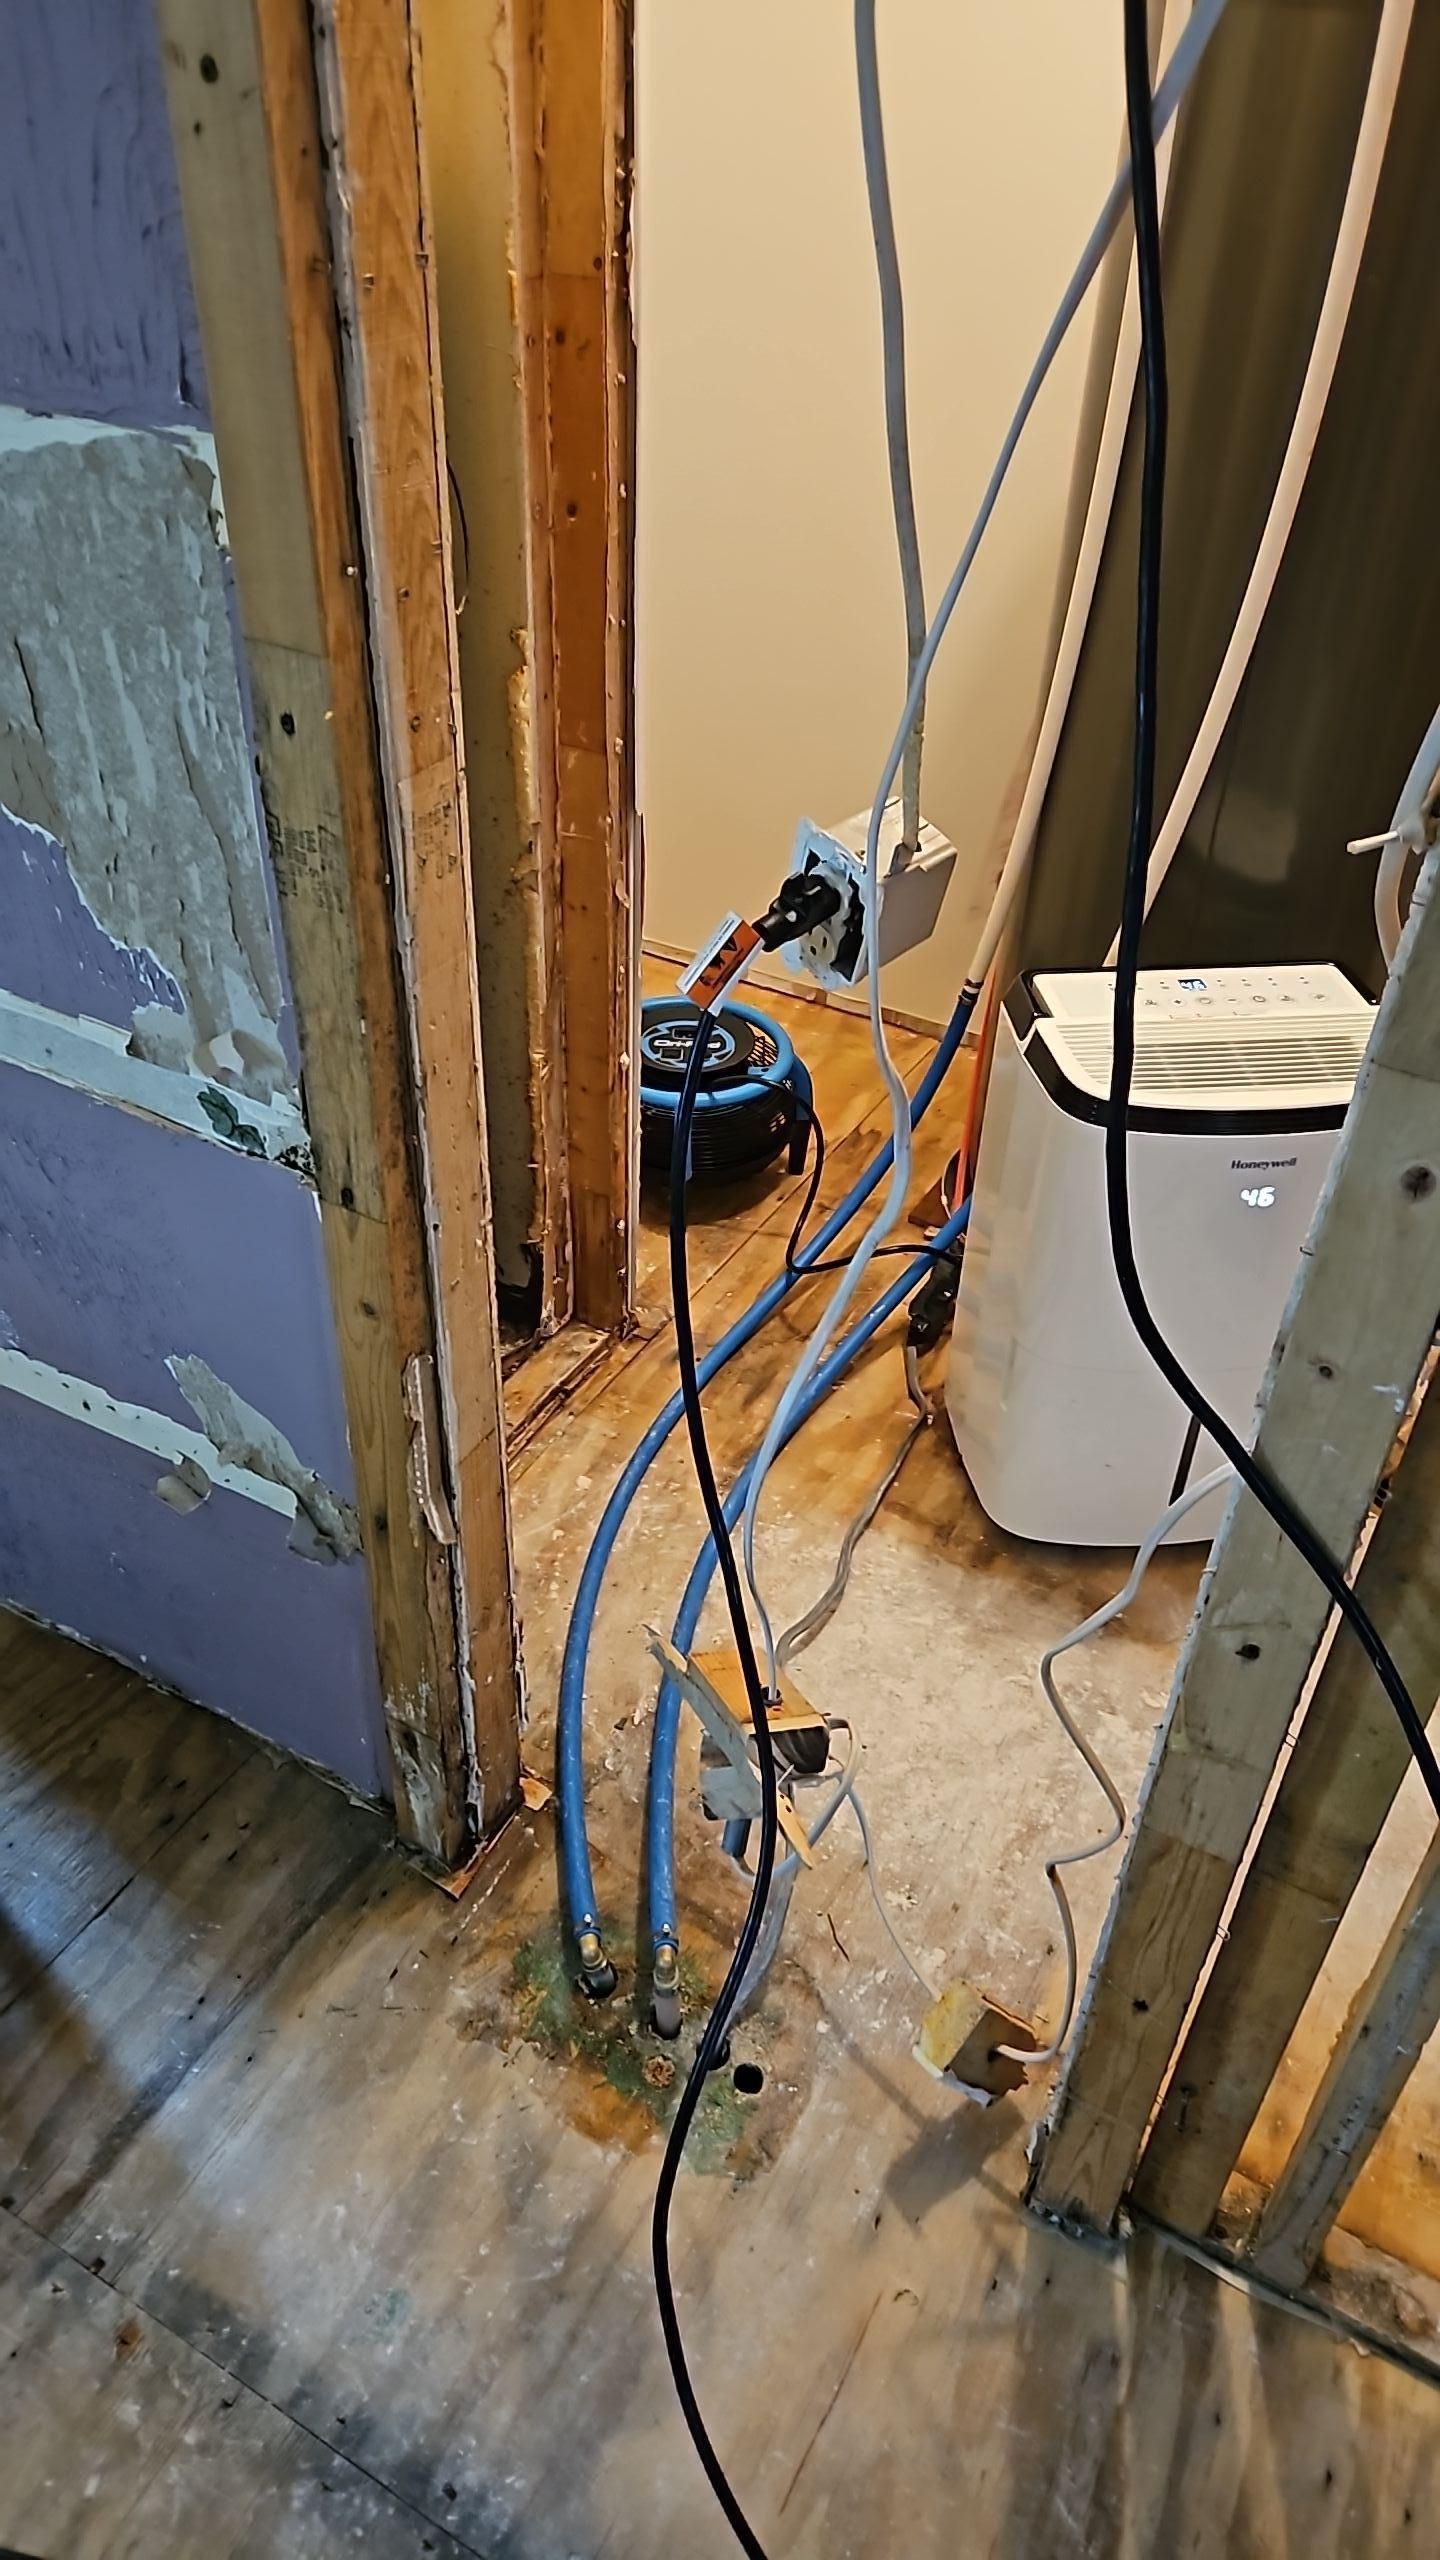
Closet Cleanup
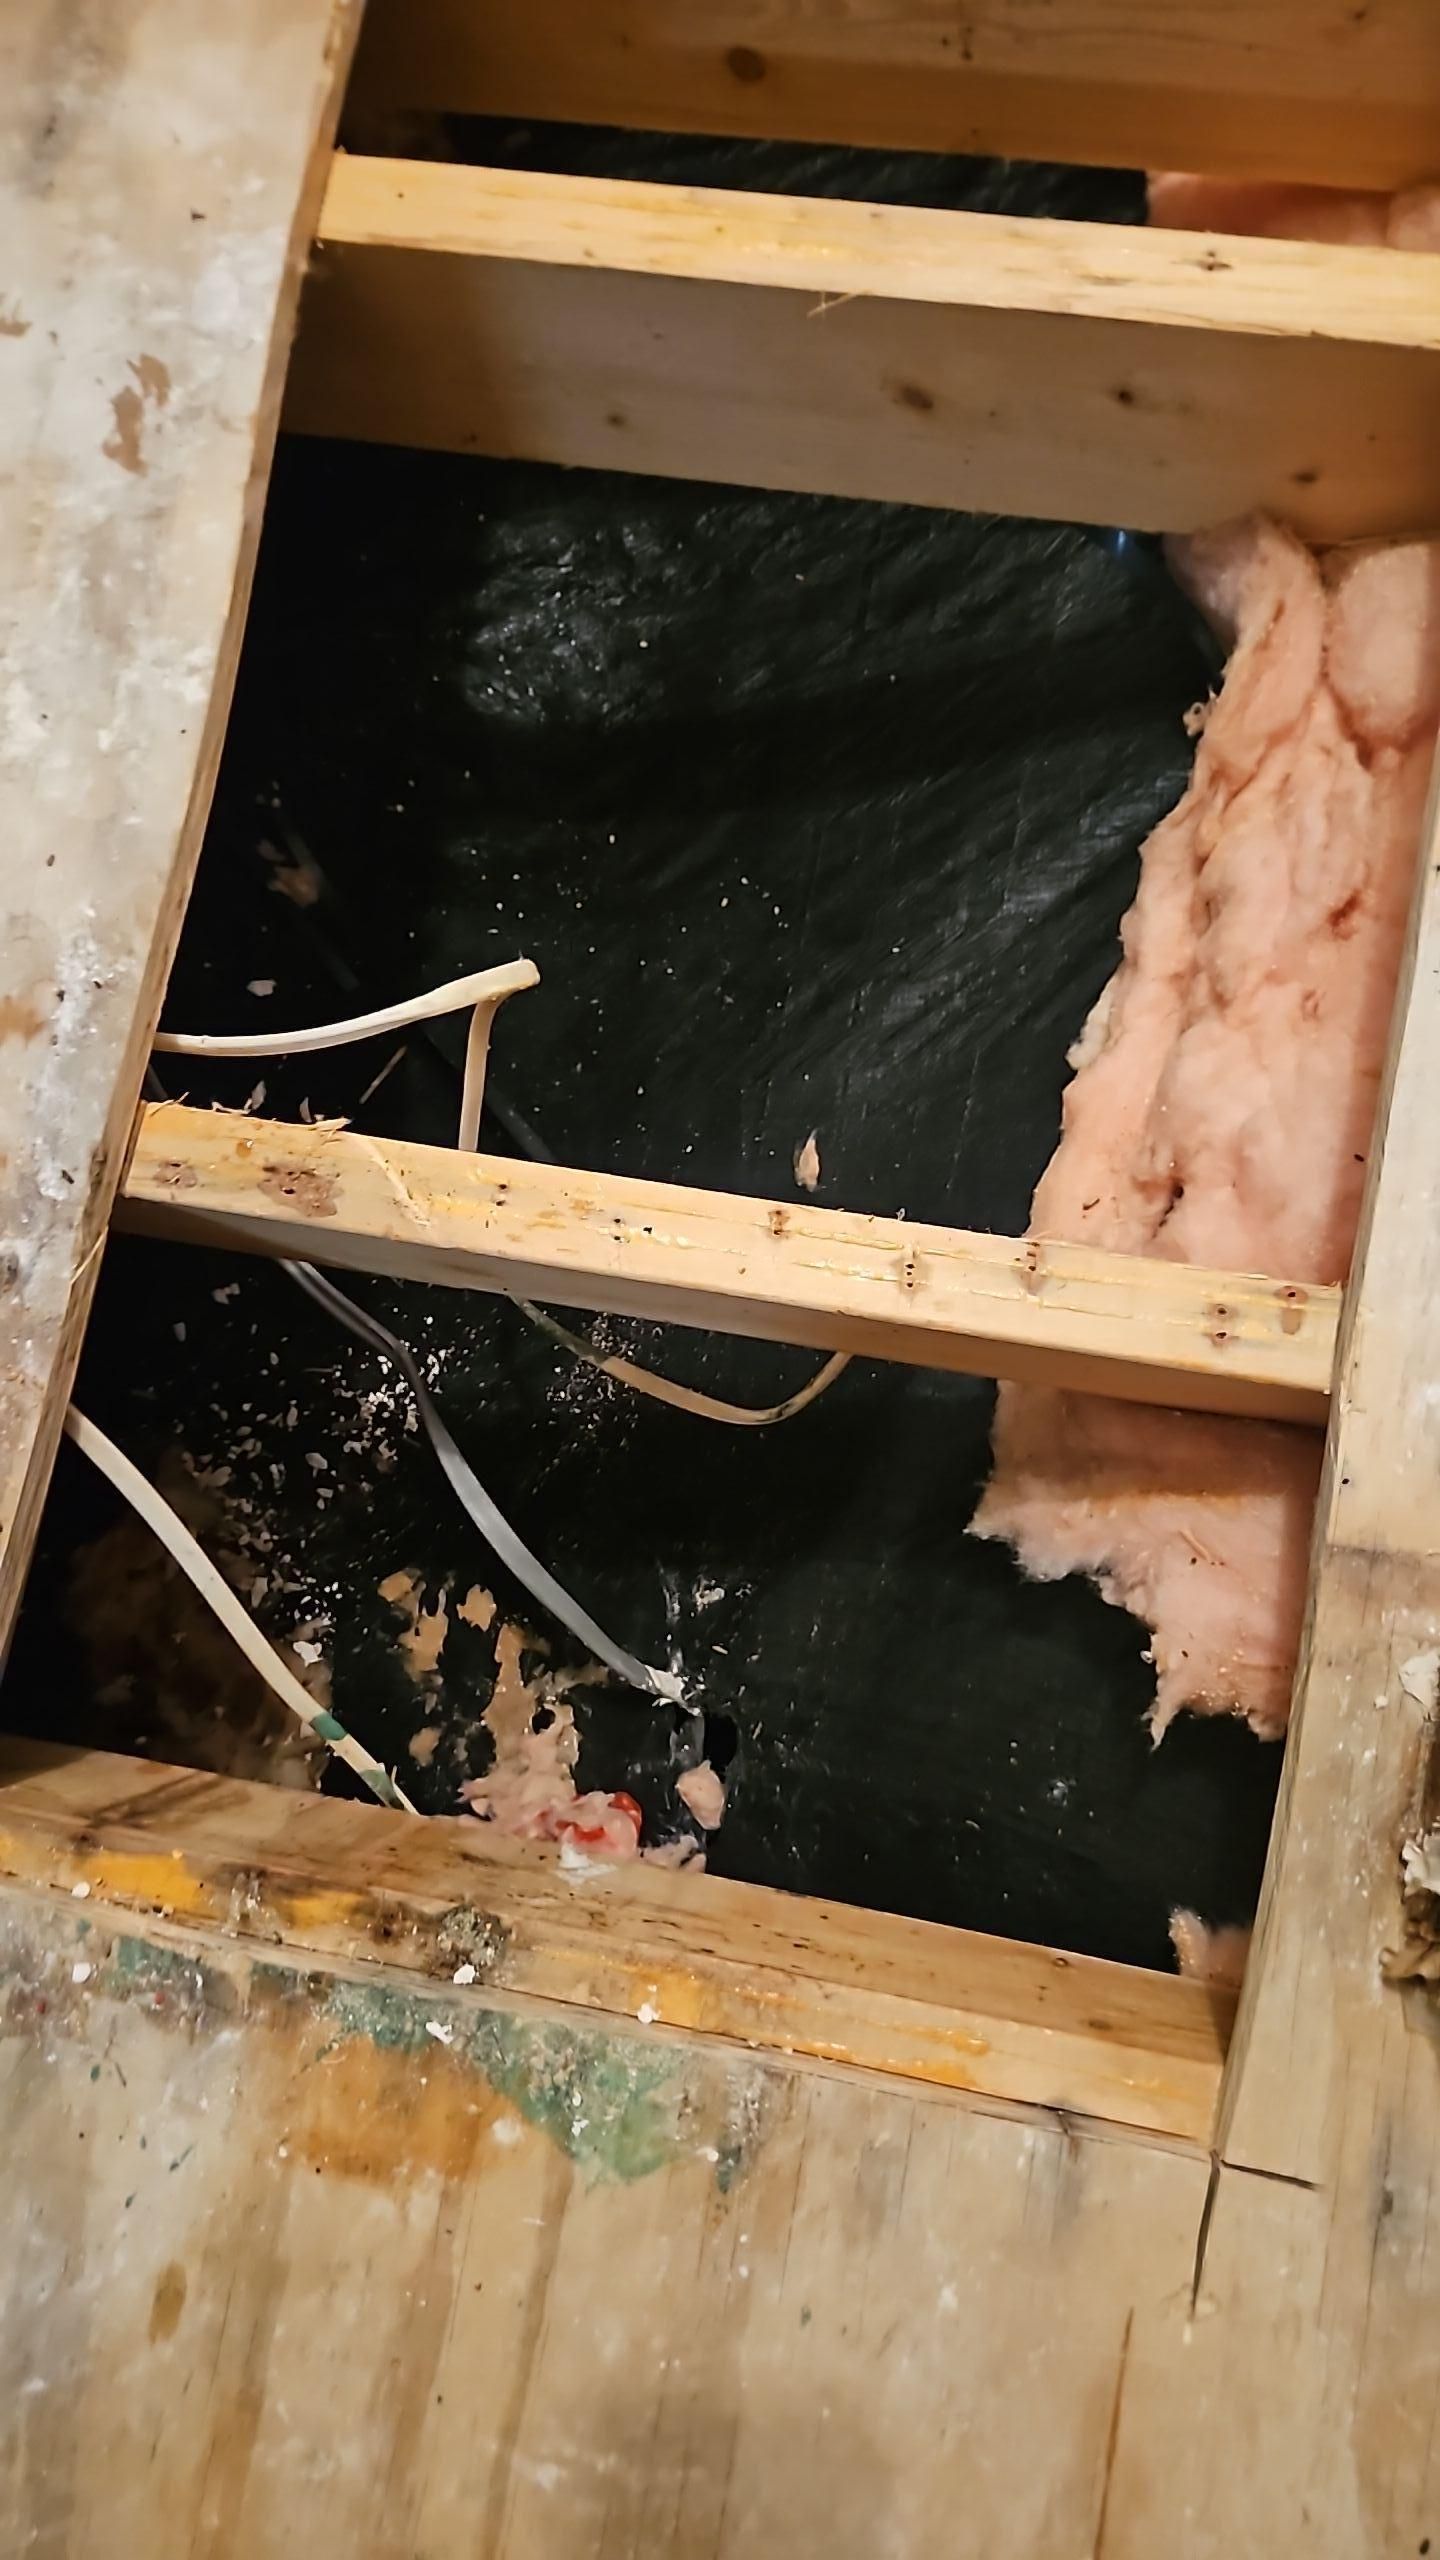
The closet was particularly tricky because moisture had gotten into tight spaces. We removed damaged drywall sections and checked every corner for hidden water. One thing people don't realize is that water doesn't travel in straight lines. It follows the path of least resistance, which means checking places you wouldn't expect.

Treating for Mold: More Than Just Cleaning
Here's where professional equipment and knowledge really make a difference. Mold isn't just something you wipe away with bleach. That approach might kill surface mold, but it doesn't address the root cause or prevent future growth.
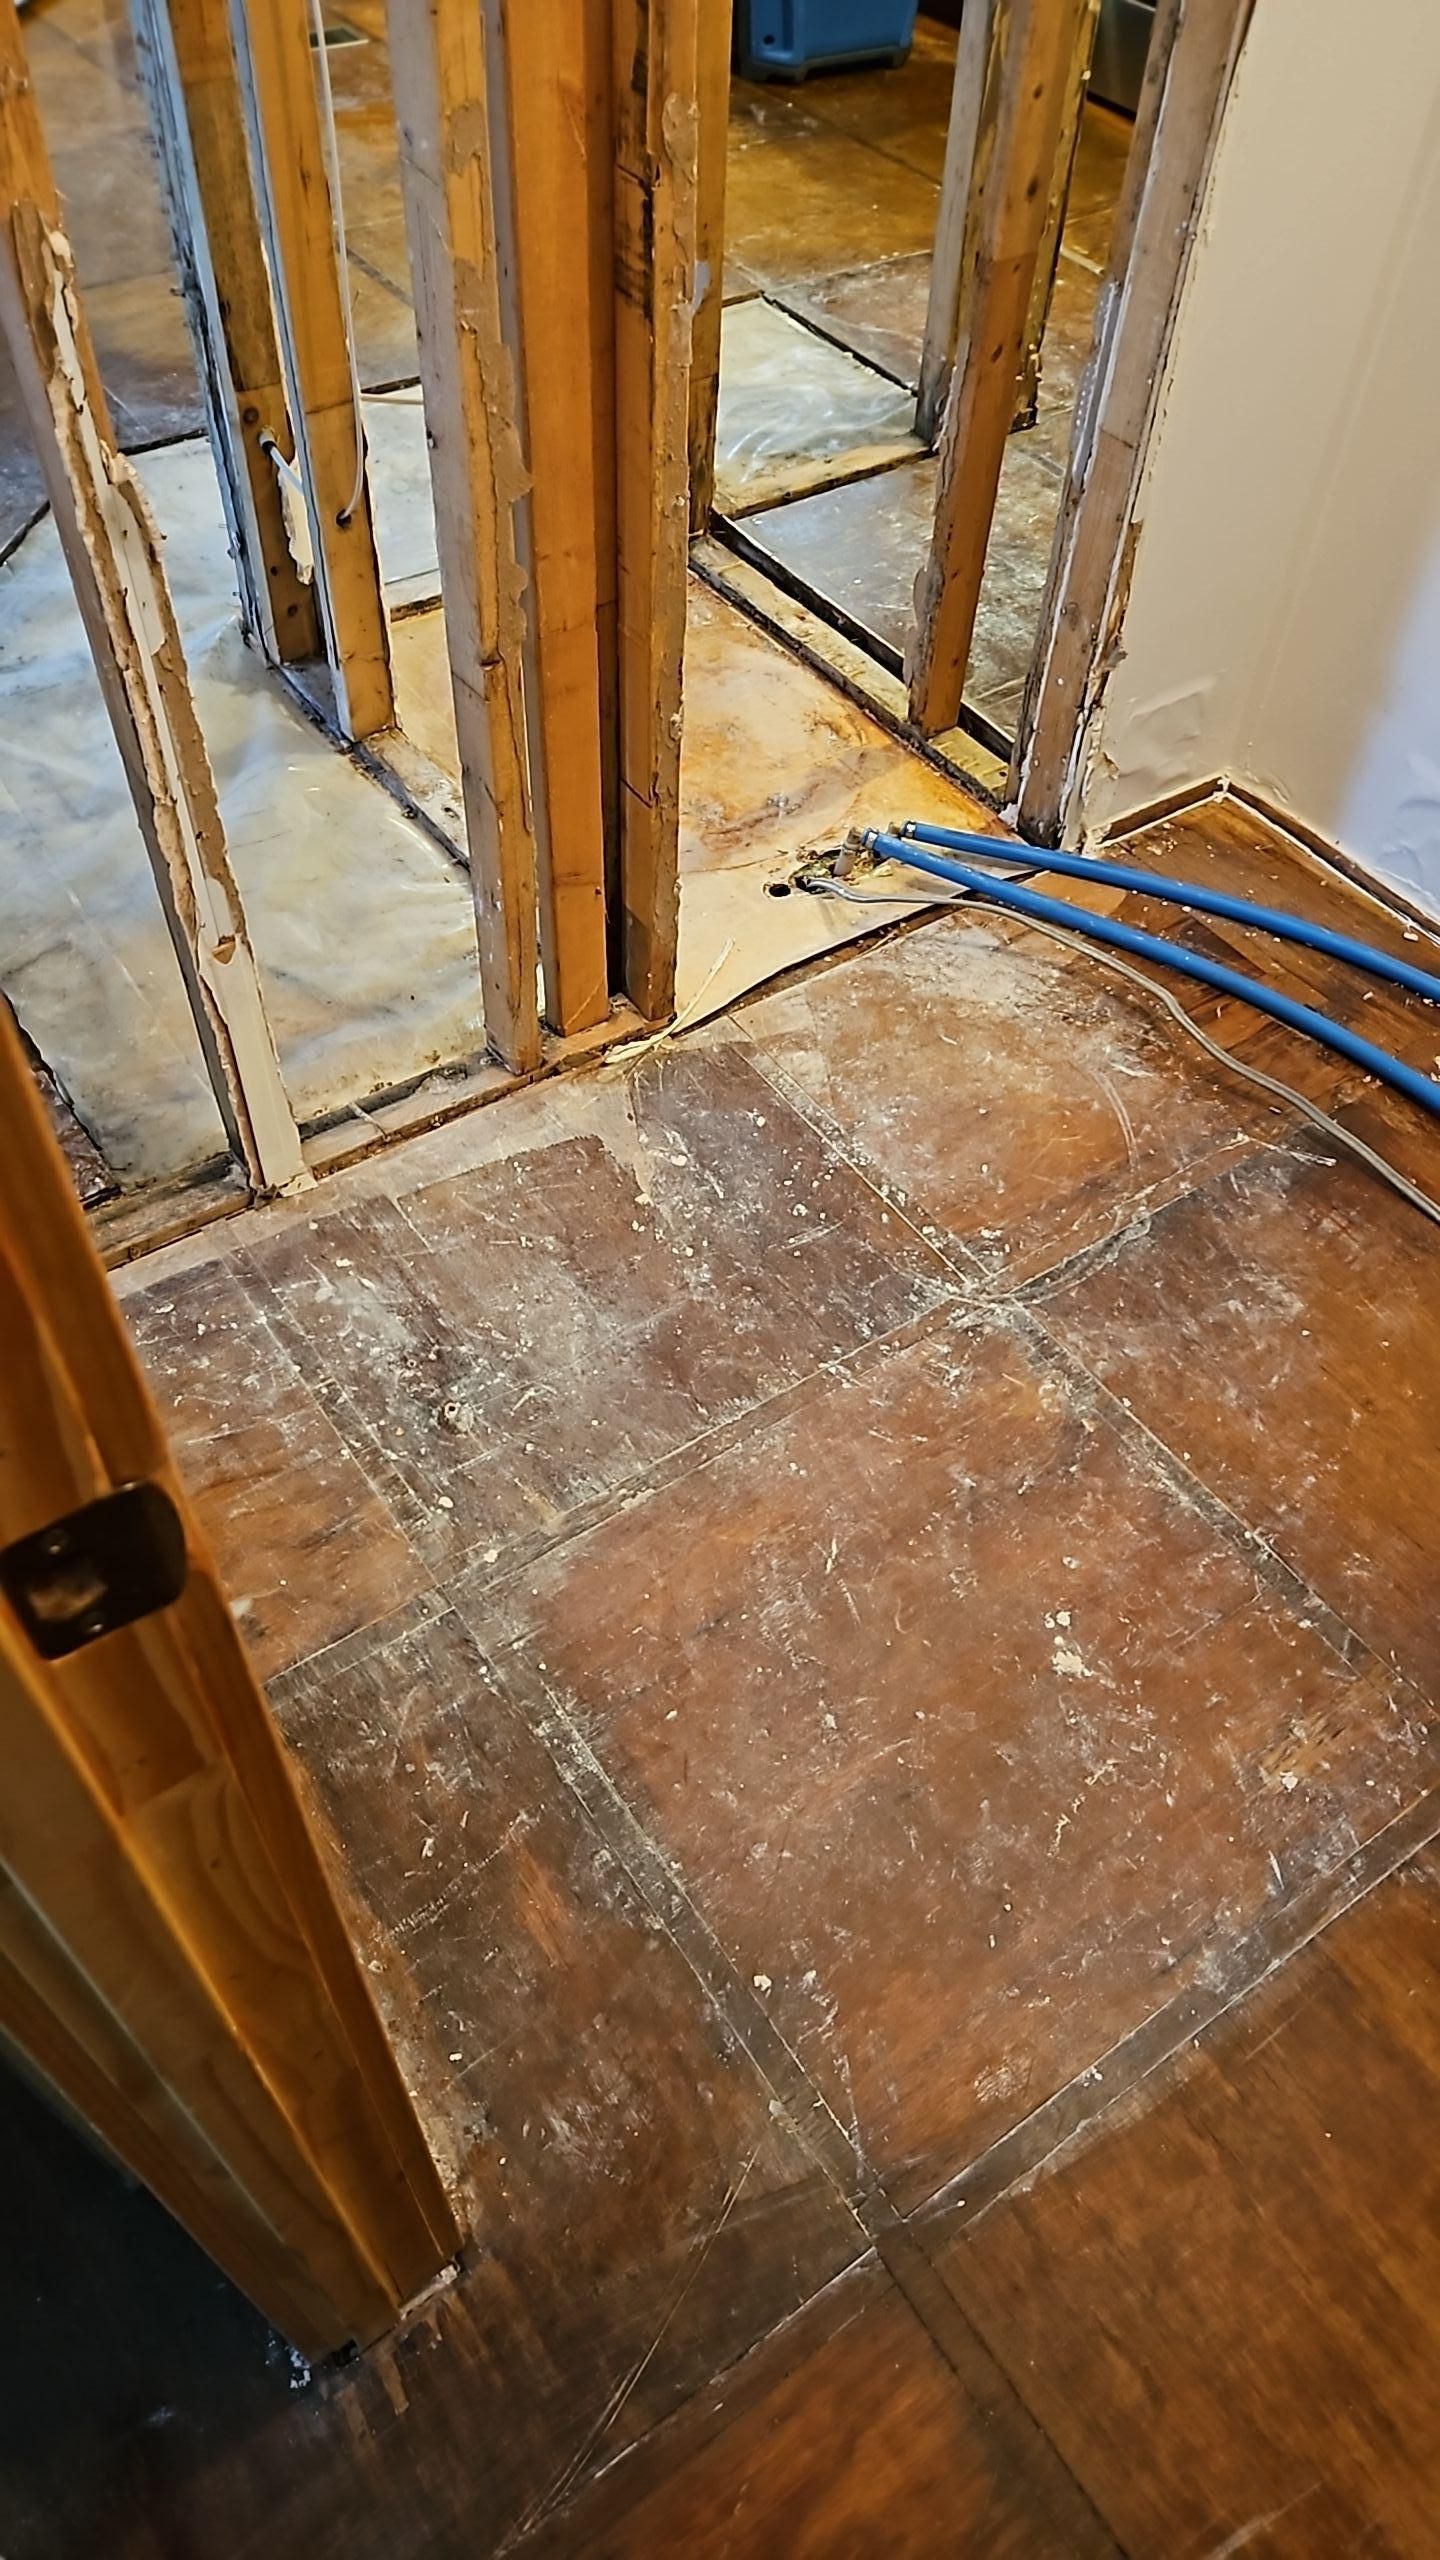
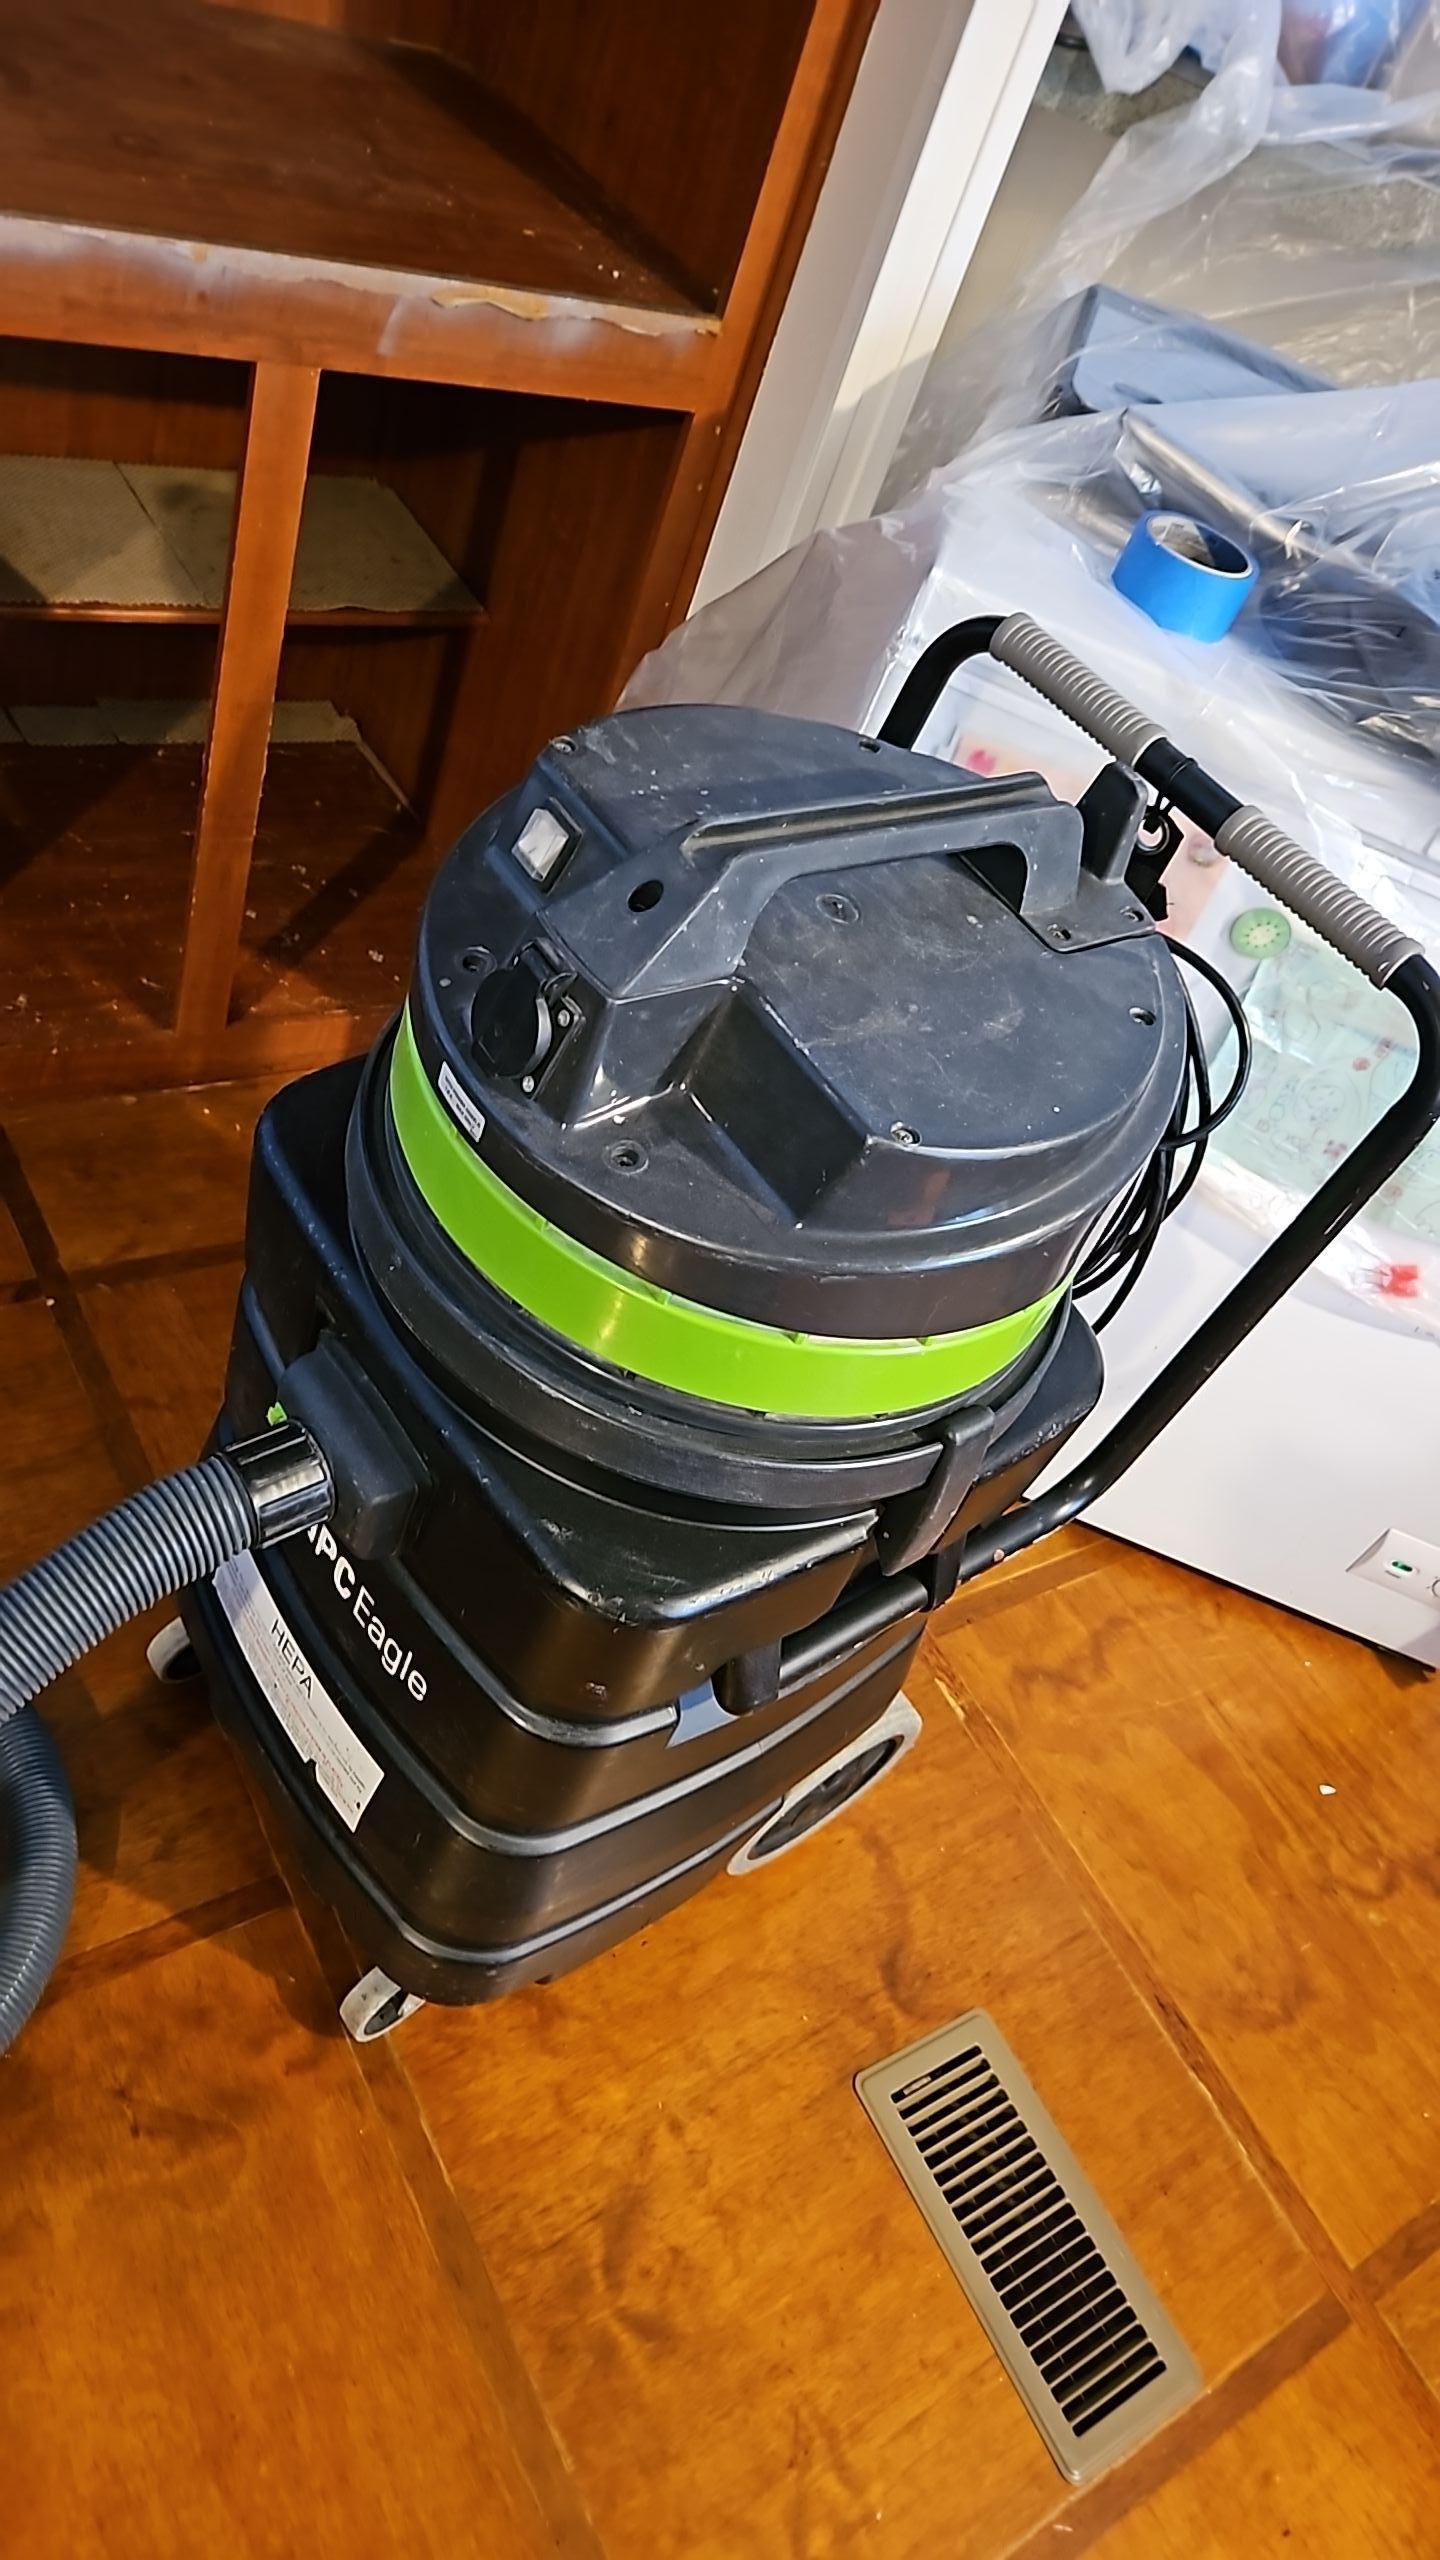
We used EPA-approved antimicrobial treatments on all affected wood framing and structural elements. This creates a hostile environment for mold spores and helps prevent regrowth after the restoration is complete. We also set up HEPA filtration systems throughout the work area to capture airborne mold spores during the cleaning process.
According to the CDC's guidelines on mold remediation, proper containment and filtration are critical to preventing cross-contamination to other areas of the home. That's why we sealed off the work area with plastic sheeting and used negative air pressure to make sure no spores migrated to clean areas.
Drying: The Most Critical Step
You can remove all the damaged materials and treat for mold, but if you don't dry everything completely, you're just inviting the problem back. This is where restoration work separates from basic cleanup.
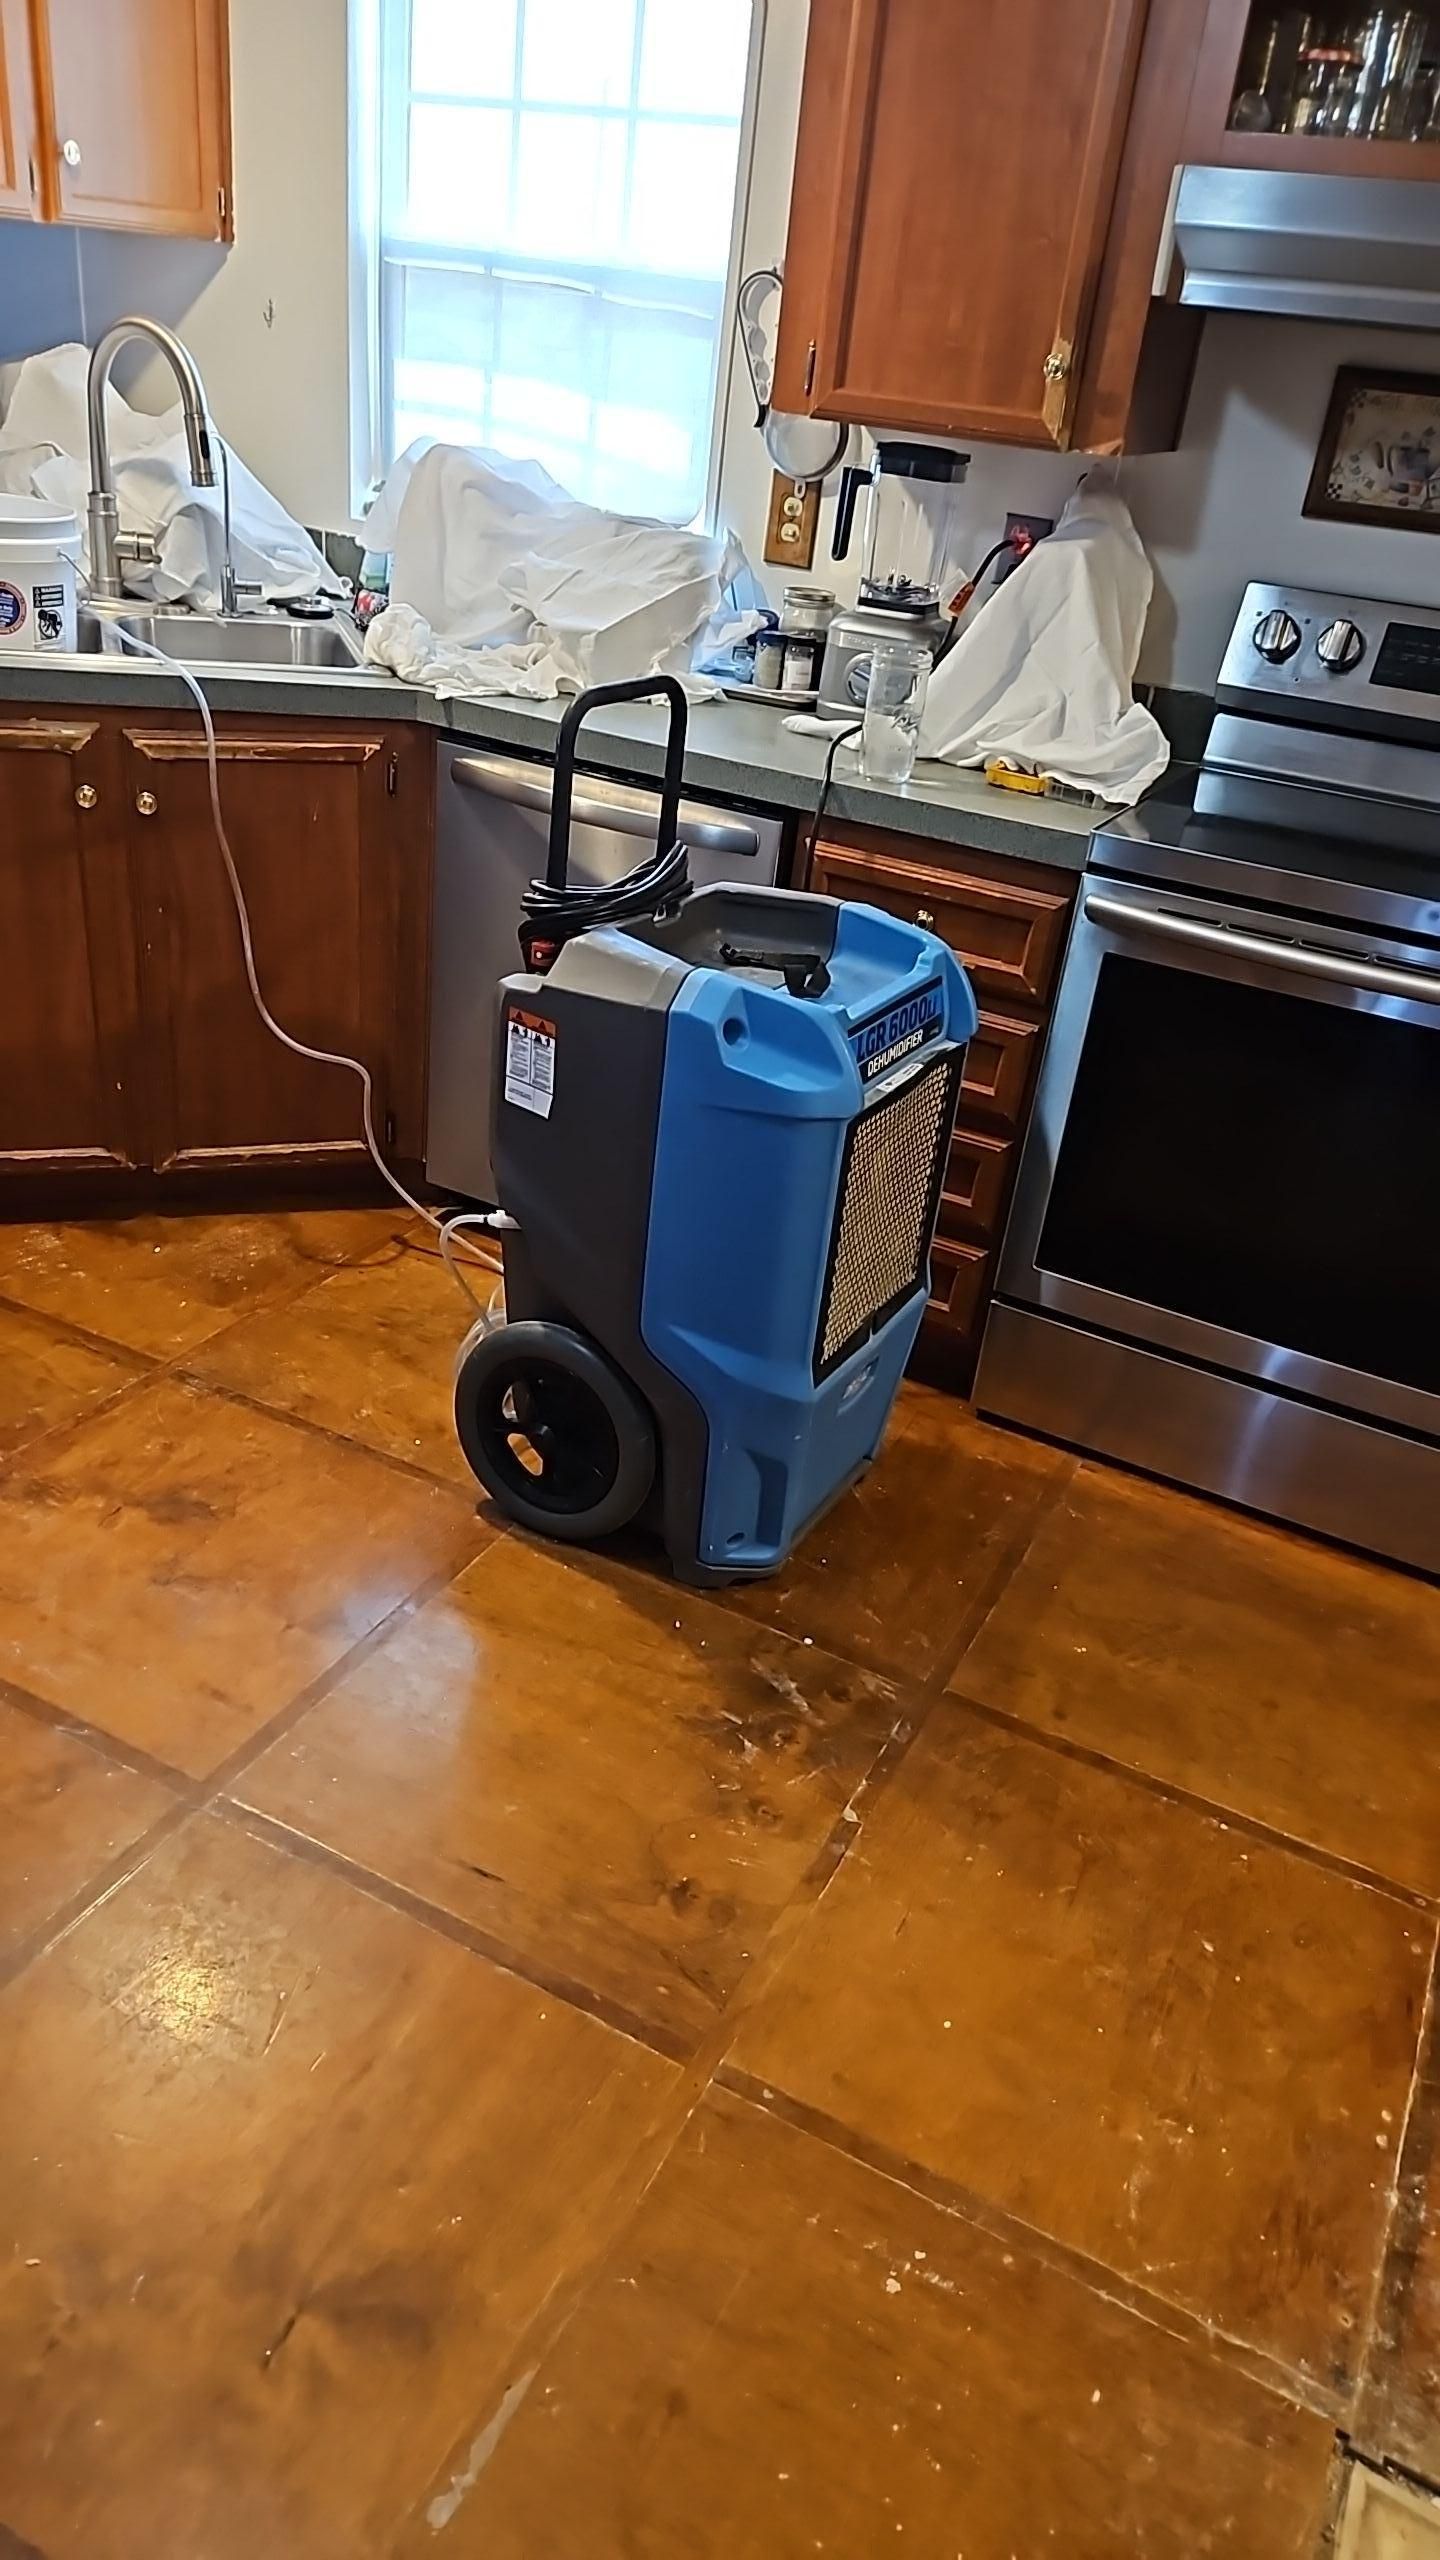
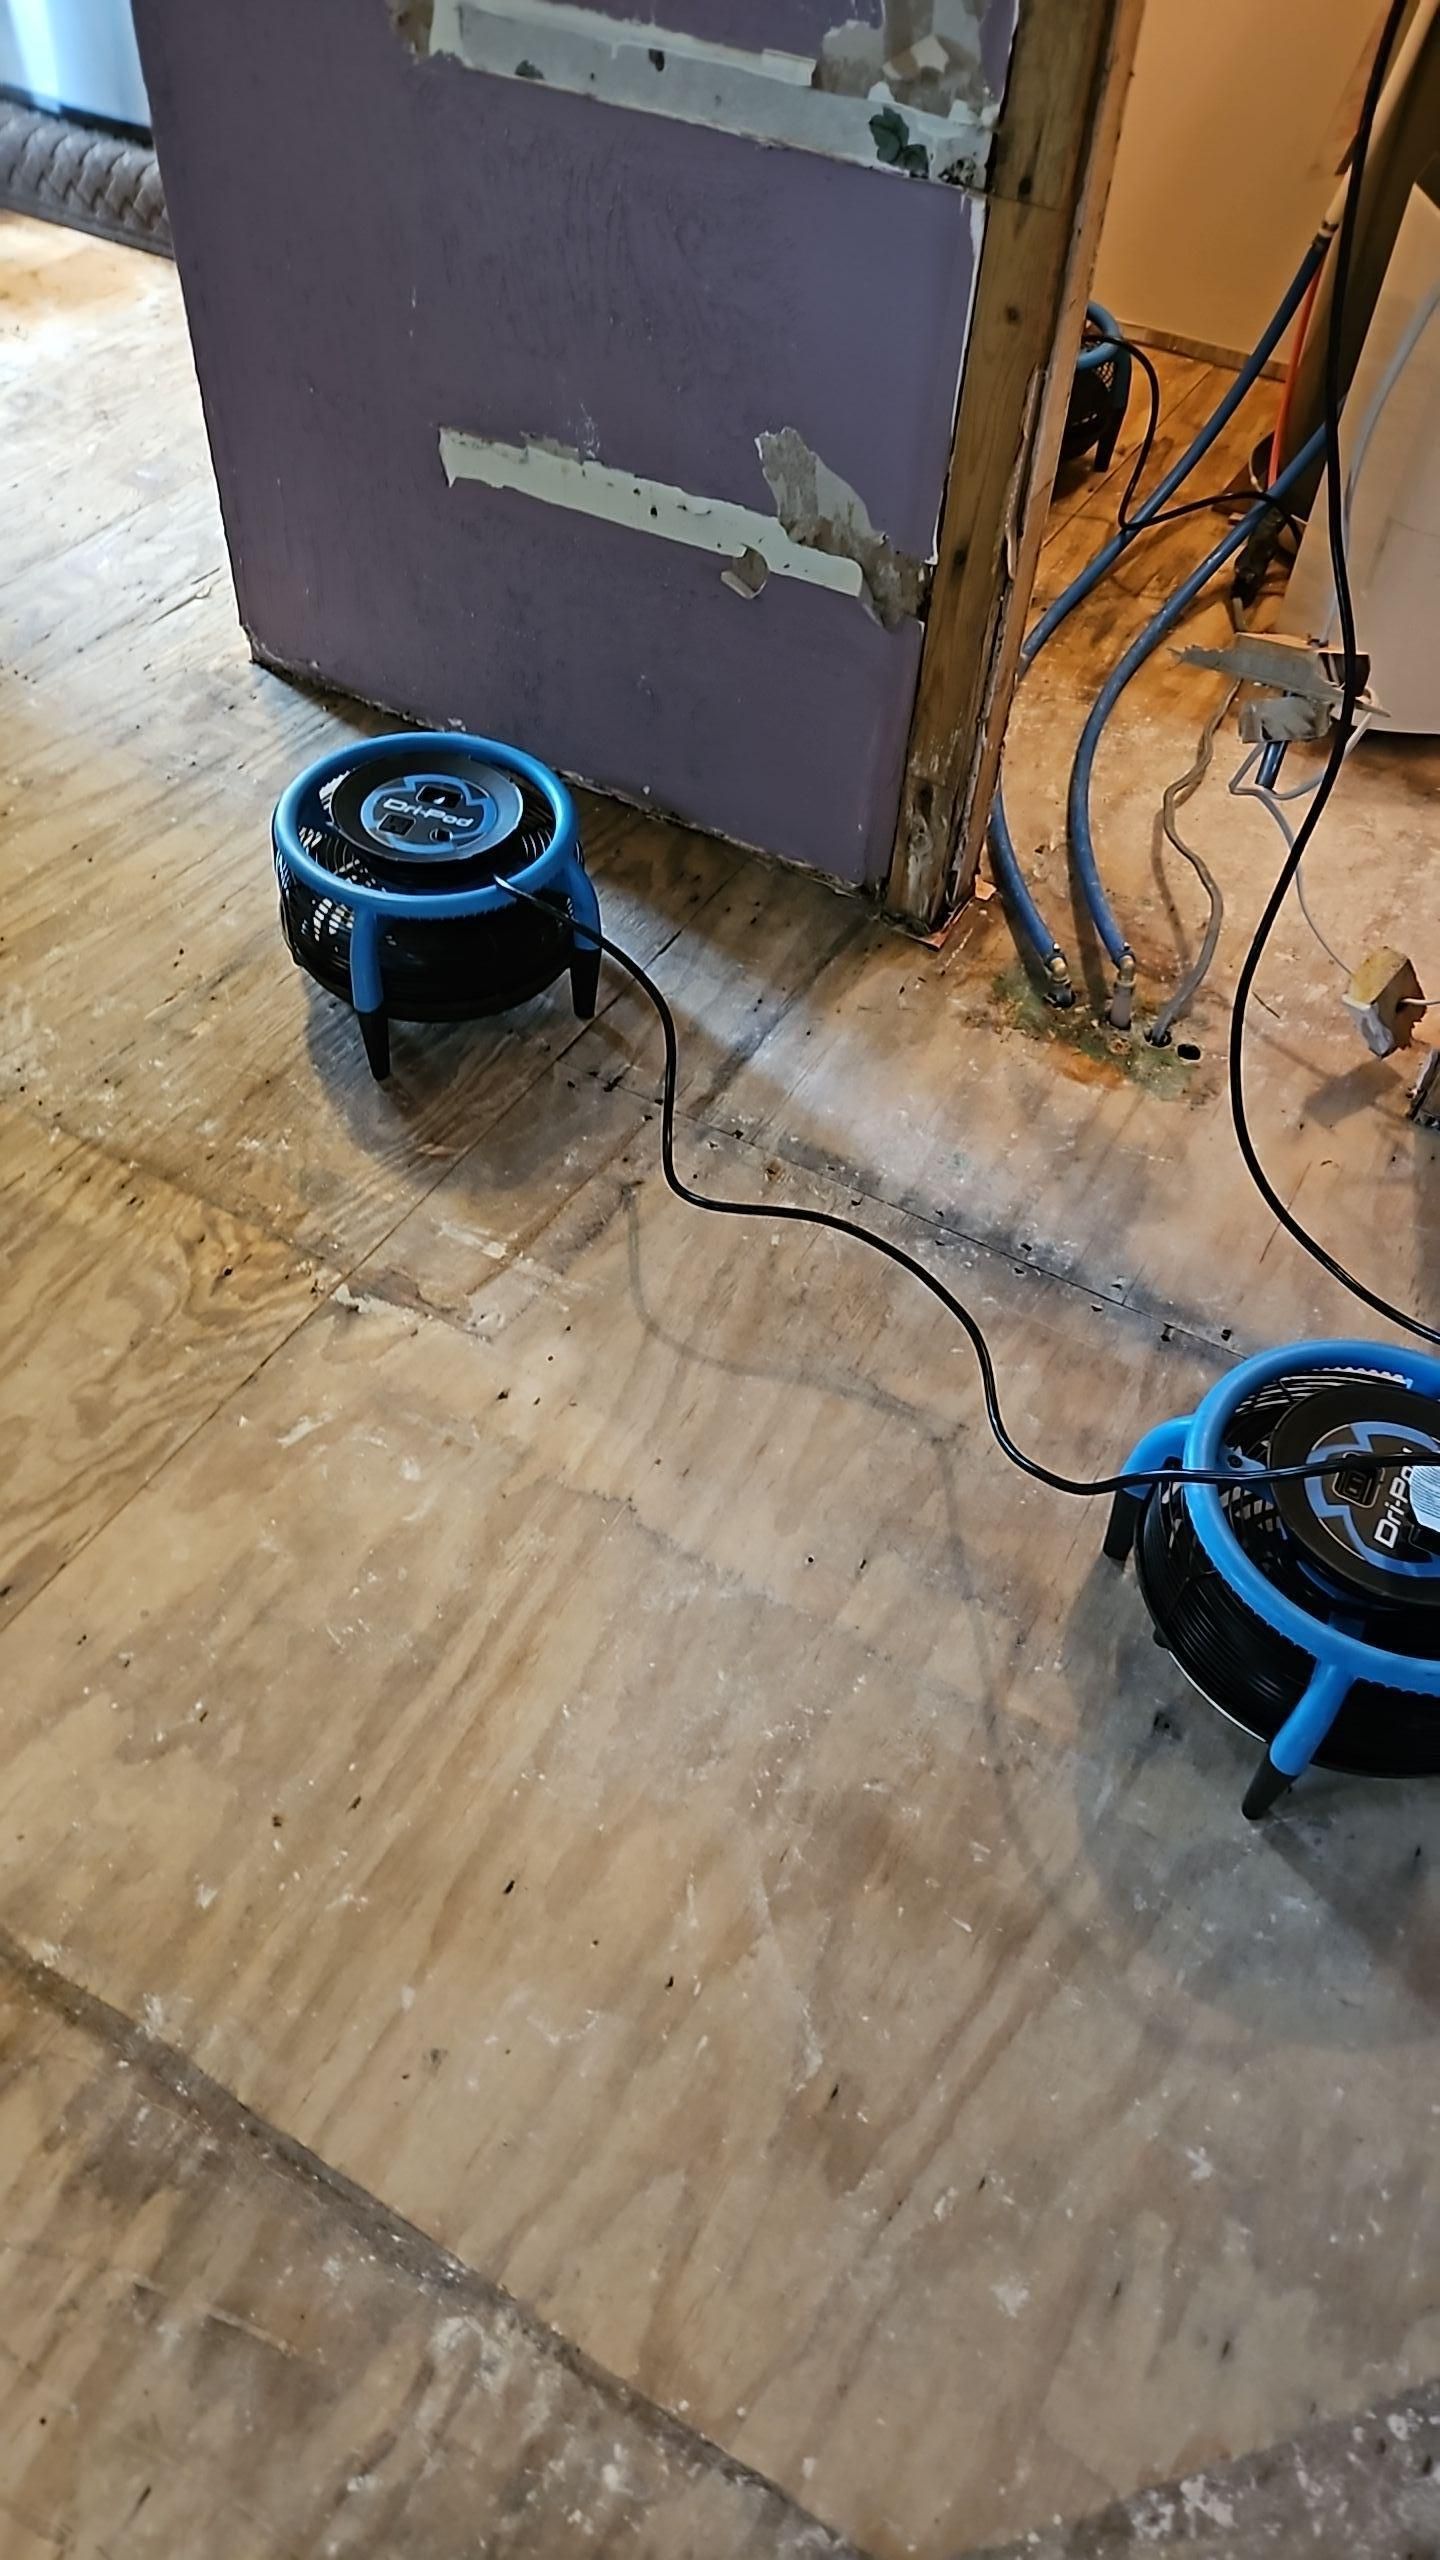
We brought in professional-grade drying equipment:
- Air movers: These high-velocity fans create airflow across wet surfaces, dramatically speeding up evaporation
- Commercial dehumidifiers: These pull moisture out of the air, preventing it from being reabsorbed by building materials
- Moisture monitoring: We checked levels daily with our meters, tracking progress until everything hit acceptable dry standards
Water damage restoration timeframes vary depending on the extent of moisture intrusion, but this job took about four days of active drying. We didn't pack up until our moisture readings confirmed the space was bone dry.
Why Professional Drying Matters
A lot of homeowners think they can just set up some box fans and call it good. The problem is, that approach rarely works. Without proper air movement and dehumidification, moisture stays trapped in building materials. That creates the perfect environment for mold to return within weeks.
Our equipment is specifically designed to dry building materials efficiently. The air movers create a rapid air exchange, while the dehumidifiers control humidity levels throughout the entire space. We monitor moisture content in the actual wood and drywall, not just the air, which tells us when it's truly safe to close things up.
Final Steps: Protecting the Space
Once everything was dry, we didn't just walk away. The final steps are about making sure this homeowner doesn't have to deal with this problem again.
We cleaned the entire work area with HEPA vacuums to remove any remaining dust or debris. Then we treated all exposed framing with a final antimicrobial application. This provides an extra layer of protection as the home moves toward final reconstruction.
We also bagged and properly disposed of all removed materials. Moldy drywall and insulation can't just go in your regular trash. It has to be contained and disposed of following proper protocols.
What This Homeowner Learned (and What You Should Know)
After we finished the job, we sat down with the homeowner to talk about prevention. Nobody wants to go through this twice. Here's what we covered:
Watch for warning signs: Musty odors, discoloration, or unexplained moisture are all red flags. Detecting water damage early can save you thousands in restoration costs.
Address leaks immediately: Even small leaks can cause big problems if they're allowed to continue. The longer water sits, the more damage it causes.
Check hidden spaces: Places like closets, under sinks, and behind appliances are common trouble spots. Make it a habit to peek in these areas every few months.
Don't ignore mold: If you see or smell mold, call a professional. DIY mold remediation often makes the problem worse by spreading spores throughout the home.
The Bottom Line
This Hutto homeowner caught their water damage problem before it destroyed their entire kitchen, but it was a close call. The mold growth was active, and if left unchecked, it would have continued spreading.
Professional water damage restoration isn't just about cleaning up a mess. It's about understanding how water moves through a structure, knowing how to properly treat for mold, and having the equipment to dry everything completely. It's about protecting your home and your family's health.
If you're in Hutto or the greater Austin area and you're dealing with water damage or suspect you have mold, don't wait. The longer these problems sit, the worse they get. Our team at Texas Certified Restoration has handled hundreds of similar situations, and we know exactly what it takes to get your home back to normal.
Dealing With Water Damage or Mold in Your Hutto Home?
Don't let hidden moisture turn into a major problem. Our certified team is ready to help you 24/7.
24/7 Emergency Response
Available day or night when you need us most
IICRC Certified
10+ years of combined restoration experience
Local to Hutto & Austin
Serving Travis, Williamson, and Bell Counties
Satisfaction Guarantee
We work with your insurance for seamless claims
Related Resources:
- Water Damage Discovery: Your Immediate Action Plan
- When a Sewage Leak Turns a Bryan Home Into an Emergency
- 10 Hidden Water Damage Warning Signs Homeowners Often Miss

Tracy King
About The Author:
Tracy King, of Texas Certified Restoration, brings over 10 years of combined industry experience to the disaster restoration field. Since the founding of the company, Tracy has been committed to providing professional and dependable restoration services to homeowners and businesses throughout the Greater Austin area. With a passion for helping clients navigate the challenges of water damage, fire damage, and other disaster-related situations, Tracy leads a certified team dedicated to delivering quality service that helps families and businesses resume normal life after unexpected emergencies.
Read More: